We had a wonderful visit with our family on the Gold Coast last Friday and once again I could hold my beautiful grandson, Jamie. The only downside is the trip there and back because the traffic is terrible. Still, it's worth it to see everyone, catch up on the news and see how Jamie is progressing.
There is no doubt in my mind - food and drinks made at home from scratch are far superior to what you buy at the shops. Not only are they tastier, fresher and healthier, they usually cost less for a better product. I spent some of my Sunday making a few odds and ends in the kitchen. We had been given a free box of apples and I wanted to do something with them; the first night I made an apple crumble. That still left over 300 apples, so I skinned and seeded a bowl full of them and made up a litre of apple juice. If it wasn't so labour intensive, I would have juiced them all but I had to de-seed the apples because there is a small amount of cyanide in the seeds, and these apples were commercial apples, waxed, so I had to peel them too. Still, the juice that resulted from that exercise was so good; Hanno and I had a chilled glass each with our roast pork for dinner. The leftover pomace has been bagged and frozen for future apple and fruit cakes.
I found some pickling onions at the store on Friday so I bought a kilo. While I was at Tricia's, we went out for lunch a few times and I had one of my favourites - Ploughman's Lunch - a mixed plate of sourdough, good tasty cheese, pickled onions, gherkins, ham sliced from the leg and a relish. One of those lunches had the most delicious pickled onions I'd had in a long time. Clearly they were not a commercial brand, and had probably been made by the chef. I think they were pickled in balsamic vinegar. They inspired me to make pickled onions, hopefully as good as those I had on my ploughman's plate. I really like having a jar of pickled onions in the fridge. They last a long time and they're a wonderful addition to a lunchtime sandwich or a snack plate.
This jar will sit for two months to let the vinegar and spices do their magic before we eat them.
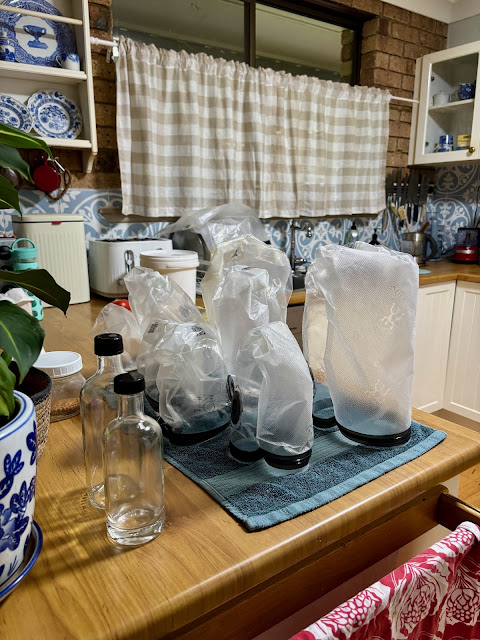
There seems to be quite an interest here in preserving, so I thought this would be an excellent starting place for those of you who haven't done any preserving before, have no equipment, but would like to give it a go. All you will need for this, apart from the ingredients, is a litre | quart sized preserving jar, with a pop-top lid, in good condition, a saucepan large enough to boil it in (completely covered) and a smaller saucepan for the vinegar. The jar I used is one of those Italian preserving jars you can commonly buy in either a supermarket or department store here. Recycled jars are fine for this job - make sure they're undamaged and the lid is perfect. Wash the jar and lid in warm soapy water and rinse it well.
Let me say first that many of my American friends might be a bit concerned with these instructions. I'm not going to use a water bath or pressure canner, but these onions will be fine for about a year without that processing. It relies on high acid vinegar and sugar to keep the food safe; both of them stop micro-organisms surviving in the highly acidic, sugar liquid. This way of preserving is common in Australia and the UK and although your method of boiling everything is how you're advised to can food, this is the common way to put up pickled onions in the Commonwealth.
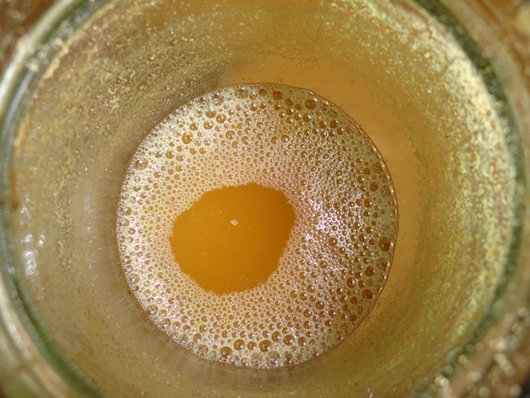
If you ever see this Melrose vinegar (or Braggs vinegar) in the shops, grab it. It will be more expensive than ordinary vinegar, but it contains "mother of vinegar" and with that you can make your own vinegar. Before you buy, lift all the bottles up to the light and buy the one with the most strands or blobs of stuff floating around. I know that sounds gross, but the "mother" floats around in the vinegar.
The taste of the end product will depend on the quality of the ingredients you use. Do NOT use your cleaning vinegar for this. I used the excellent Melrose unpasturised apple cider vinegar and Cornwall's Apple Cider Vinegar. I didn't have enough Melrose for this recipe because I wanted to keep the "mother" in the bottom of the bottle for making new vinegar. So I added a small amount of Cornwall's vinegar to make up the volume. Vinegar used for pickling must be at least 5% acid. Melrose is 8% and although Cornwall's never state on their label what level of acidity it is, they recommend it for pickling so it must be at least 5%.
PICKLED ONIONS - INGREDIENTS
1 kg | 2.2 pounds small pickling onions
50 grams | 2 oz rock, sea or lake salt
600 mls | one pint good vinegar - at least 5% acidity
3 tablespoons honey or sugar
2 teaspoons allspice berries
2 teaspoons mustard seeds
1 teaspoon black peppercorns
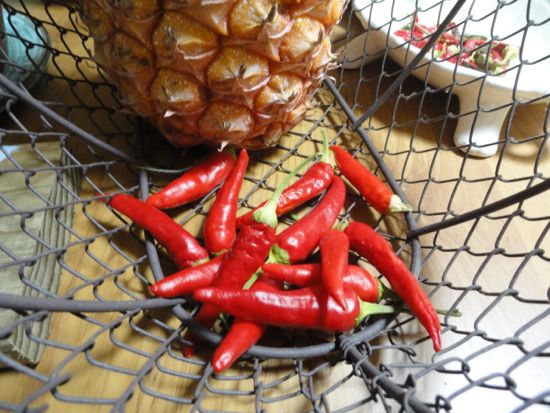
2 dried chillies
2 bay leaves
If you're in Australia and you can't find all the spices in the shop, use a packet of Menora pickling spice. I bought mine at IGA.
METHOD
- Cut the top and bottom off the onions and place them in a bowl. Cover them in boiling water and leave for about a minute. Pour off the hot water and replace it with cold water.
- When the onions are cool, slip the skins off the onions. Dry the bowl, place the onions back in it, and sprinkle the salt over the onions. This will draw fluid form them. Leave this, covered, for 24 hours.
- The next day, boil your jar and lid in a saucepan. It must be completely covered. Bring to the boil, then let it boil for 10 minutes. Turn off the heat and leave it in the hot water until you're ready to fill the jar, it must be hot when you add the hot vinegar.
- In a small saucepan, add the vinegar, sugar and all the spices and leaves. Bring to the boil, making sure the sugar has completely dissolved. Let it simmer for a two minutes while you prepare the jar and onions. If you want to taste the vinegar, now is the time to do it. To adjust the flavours, add more vinegar, sugar or spice. Remember that the flavours will develop a lot while it's in the jar and what might taste quite harsh now, will turn into a soft and mellow liquid in a couple of months.
- Wash the salt off the onions, then place the onions in a colander to drain.
- Now you have to take the jar from the water without burning yourself and without contaminating the inside of the jar and lid. With your jar tongs, take the jar from the water and place it on the bench, making sure all the water has drained out. If you have no jar tongs, pour the water out of the saucepan, pick up the jar on the outside with a tea towel and lift it out. Don't touch the inside of the jar, it must remain sterile. Same with the lid - you can touch the outside but not the inside.
- Pack the onions into the jar then pour the vinegar over the onions and fill it right to the top of the jar. The vinegar will still be very hot so be careful. Put the lid on the jar straightaway. The hot contents will help form a vacuum seal.
When the lid goes on, you'll notice the pop top button on the lid will be up. When the vacuum seal happens, that button will invert. That is your sign that it's sealed properly. When that happens, you can store the jar in your cupboard for up to a year. You want the vinegar mix to infuse the flavours into the onions, so let it stand for at least six weeks to mature before opening. When you open the jar, it must be stored in the fridge.
If the pop top on the jar doesn't invert, the onions are still okay to eat, but you'll have to store them in the fridge and eat them within three months.
Preserving food in jars, while not as popular as it once was, before so many of us got freezers in our homes, still holds relevance for those of us living this way. It's a useful skill to learn. You can put up several jars, or a whole pantry full, or you can do what I do and make small numbers of gourmet food jars that can be enjoyed for a fraction of the price you'd pay for the same quality in the shops.


.jpeg)


.jpeg)
.jpeg)
.jpeg)
.jpeg)
27 Comments
we pickle onions for christmas, to eat with nice meat and cheese, i add loads of spices to some and they will blow your head off and some I make are mild, i always grow shallots, they are tuppence a tonne in france and i'll bring some back and pickle them when i go on my hols. lovely post.!
ReplyDeleteThose onions look good, Rhonda. Did you ever pickle hard boiled eggs, beets and onions at the same time? Everything turns a lovely shade of dark pink and they taste oh so good!
ReplyDeleteScrummy
Rhonda, thank you for sharing this..can you tell me IF this recipe would also work by adding veggies like cauliflower in with the onions? Given the information of the differece in acid of vinegars.
ReplyDeleteI have so many questions but will leave this comment as is:)
~~HUGS~~
Thank you so much for this. My Husband if often asking if I could give pickled onions a go. My grandmother used to make them for us in Uni but I have never attempted them. Now I have these instructions I will definitely give it a go!
ReplyDeleteSarah x x
frugal queen, those shallots would be delicious pickled.
ReplyDeleteScrummy, I've never pickled eggs.
Blessings, yes, thats called piccalilli and it's done the same way. I have a recipe for it written out in one of my books. I'll add it later.
Sarah, I hope you try it. It's always a great thing to have in the cupboard.
Hi Rhonda,
ReplyDeleteThanks for that recipe, I've been wanting to pickle cucumbers for ages now as I can't find any that are made in Australia and the source is important to me. It seems like a good one to show teenagers too, they both eat them so now they'll know how to make them.
Agree with you re the traffic, we live on the Gold Coast and the school run takes 30 minutes peak time or 10 non peak!
Vickixx
Rhonda, I love your pickled onions, they look so lovely in the jar....I also do pickled onions which we have run out of, but when I do mine I slice them before salting...slicing them before hand I have found is so much more convenient, and they are great on a sandwich.
ReplyDeleteGreat post, keep up the great work.
I was given a big box of yummy apples too this week I froze alot and made a upside down cake and in the spirit of preserving I am having a giveaway maybe some of your readers and yourself might like to join here http://farmgirl67.blogspot.com/
ReplyDeleteRhonda
ReplyDeleteYou must've struck the traffic at the wrong time. We were on the Gold Coast on the weekend and got a good run home to Brisbane at around 4pm. But then again, you do have a bit further to go then us.
I love a good Ploughman's lunch too.
Thank you so much for this Rhonda. My aspiration is to make our own bread and one day start preserving our own produce.
ReplyDeleteWe do make "sledjic". Polish mix of raw herring (not rollmops herrings in oil not vinegar), extra oil, garlic, onions, capers. Very yummy on toast for breakfast.
jillx
Thanks for this recipe. I'll keep an eye out for pickling onions at the shops. I've been preserving all Autumn. This is the first year I've done any preserving, and I'm hooked! There seems to be a big resurgence with preserving in our area (cool climate).
ReplyDeleteOh just the mention of ploughman's lunch takes me back to England and the ploughman's lunches served at some of the quaint country pubs. If it was lunchtime I always opted for the ploughman's. I think it was the sharp cheddar cheese that was my favourite element and I was so disappointed to find cheese only came in 'Tasty, mild and colby' when I moved down under and other vintage or more flavoursome cheeses were so expensive. I'm making a batch of your tomato relish today but wondering if you have or know of a recipe for a ploughman's pickle similar to Branston pickle?
ReplyDeleteJill, Hanno would like those herrings.
ReplyDeleteAnn, I checked my preserving books and couldn't find a Branston pickle. Sorry.
I've made a few different types of pickles in the past, my favourite being bread-and-butter pickles, but haven't pickled onions yet. The pickling onions available in town are a bit big and a bit expensive at the moment so I'll wait for now.
ReplyDeleteI live in the US and think we over think our canning or at least overdo. Strange that you never here of wild outbreaks of botulism in the UK or Australia if the process you follow is so bad. I have been using some of the instructions for canning from the UK and am now going to try your onions which sound wonderful! Thank you! Oh yeah and we are going to make ginger beer too!
ReplyDeleteThat's the way, Gayle! For these simple things, it's fine. Good luck with your onions and the ginger beer.
ReplyDeleteBotulism won't grow in very acidic or very sugary conditions, so I would never (water bath) process jams (jellies), chutneys or straight pickles like this.
ReplyDeleteI follow US instructions for bottling/canning fruits though, mostly because most British instructions are fairly antiquated and from old cook books.
I made two lots of pickled onions this autumn; ordinary ones, and then some shallots in a mix of balsamic and wine vinegars with olive oil. I really liked the balsamic ones, but the children still preferred the 'proper' ones!
My hubby loves pickled onions, he did make a batch once with onions from our garden and they turned out good. I think I will have to give your recipe a go.
ReplyDeleteI know what flavours people enjoy, what others think tastes good, but for some reason I have a very limited range of things I like... and I haven't tasted pickled onions I have liked as yet - I want to like pickled onions tho... One day I might try this recipe for my pickled onion loving family - and I'll then try one myself, lol.
ReplyDeleteI live on the Gold Coast (was brought up here), and traffic is getting out of control crazy here. Those that pick up their children at my childrens school in the car have to be at the school around 2:20pm so they have a chance of getting a park to get the children when the bell goes at 2:55. And the council are putting in the new Light Rail, so in front of the Gold Coast Hospital as well it is traffic galore around here!
It is nice to see that it is still a small world, after all...
Warmest regards,
Angela @ www.purposefulwomanhood.net
Rhonda I love pickled onions. These sound wonderful. I do not worry about water bath canning highly acidic products either. I would love to try these. Thank you B.
ReplyDeleteHi Rhonda,
ReplyDeletethat juice looks wonderful and I would love to know how you make the muffins with the leftover pulp.
Unfortunately I don't like pickled onions. I tried it once. My English teacher brought some with her during a Christmas celebration, years ago. It's not my cup of tea though ; )
Have a great day.
Hi Rhonda
ReplyDeleteThats a wonderful tutorial- thank u! The onions look so yummy. I will definitely try this :-) Love Sarndra
It's a shame that you don't live closer to here Rhonda as a few friends of ours have started a cider pressing day one Saturday a month during Autumn.
ReplyDeleteEveryone brings apples which are weighed upon arrival. Then the day is spent mulching and pressing the apples, playing old time music by the camp fire and making food and eating. It is a true celebration of Autumn.
When the cider is ready, it'll be measured out according to the apples contributed and probably drunk as a celebration too. A real community event.
thanks also for your kind messages for my Dad. I've passed them on and they have meant so much to him. He is coming home tomorrow.
Gayle,
ReplyDeletethe reason you do not hear of as many outbreaks of botulism poisoning in the UK or Australia, is because they do not have as much botulism in the soil as we do here. Most areas of the US have fairly high concentrations.
Juice, tomato paste, and steamed dinners can be made using Lehman's steamer
ReplyDeletehttp://www.lehmans.com/store/Kitchen___Juice_and_Beverage_Making___Lehman_s__Best_Steam_Juicer___10105
It's very simple to use and is easy to clean up.
When processing apples,simply remove stem, quarter and place in collander section. The juice goes to the bottom of the pan where it can be siphoned off and bottled. The apple pulp can then be put through a ricer, heated, and made into applesauce. It's a great time saver, especially if you're processing a lot of fruit.
It's also great for making juice when the berries are ripe, then when it's cooler in the fall, turning the juice into jelly.
For more information, just contact Lehman's. Be sure to get the stainless steel one, they last longer.
Hi Rhonda
ReplyDeleteWhen i've had a lot of apples, I always use the peelings to make cider vinegar. It started off as an experiment (stuffing a jar full of peelings and cores and using your recipe of course!) but turned out strong (can test using a hydromoeter), developed the mother and was the best tasting vinegar I have ever come across. We've made a huge amount at almost no cost and limited effort. It saves on buying fairly expensive vinegar!
How funny, reading your comment about vinegar and threads or blobs, i have thrown mine out in the past ,,,wondering how it went off lol as I binned it!!
ReplyDeleteThank you for clearing that up
Liz
I welcome readers' comments. However, this blog never publishes business links or advertisements. If you're operating a business and want to leave your link here, I will delete your comment .