30 January 2015

Weekend reading

This is one of our local lizards, climbing out of the chicken coop after looking for eggs. This old boy is about 6 feet long from nose to tail.

The very hot weather and humidity has eased up a bit here. The days are warm but pleasant.  I hope you're not too cold or hot. Enjoy the weekend as we cruise down to autumn.

Delicious vegetarian meals
What the British are buying at the supermarket
Preserved tomatoes
Meet the farmer - Jo Salatin @ Polyface Farm | You Tube
SHARE:

29 January 2015

Buying meat in bulk

If you have a large freezer, a fairly easy way of saving money when buying meat for the family is to buy your meat in bulk from a family butcher.  We don't eat as much meat as we used to but we used to save a lot of money with a bulk meat buy every so often.  It doesn't seem to be a popular option now and I wonder why.  My guess is that most people are used to buying food on a small tray at the supermarket and the thought of a bulk buy of many kilos or pounds of meat is overwhelming for them.


The best way to go about this is to find a butcher close to where you live, go in and talk about the meat you need.  Before you go, work out if you want beef, pork or lamb and let the butcher guide you with prices, cuts and delivery. Beef is very big and instead of going for a side, you can order either a forequarter or a hind quarter. A hind quarter will weigh about 60 kg/130lbs and is made up of  T-bone, round, topside, eye fillet, rump, silverside, skirt steak, shin, mince/ground beef, sausages, bones and fat. My local price for beef now is around $8 to $9. In Woolworths, just for comparison, eye fillet is around $40 a kilo and T-bone is $22 a kilo. But what you're getting, even though it's the best end, is some of the cheaper cuts too - the shin, mince, sausages are all cheaper, but taking the hind quarter as a whole, is cheaper than buying smaller portions at a supermarket. I think the quality is better as well. So if you bought this 60kg hind quarter at $9 a kilo, you'd pay $540. Remember, these prices are only an estimate.


Of course, $540 is a lot of money to pay out for meat so it's a wise option to ask a friend or relative to go halves with you. You would each get around 30 kg/66lbs of meat for $270 and that could be made to last quite a while. It's a good idea to get back to the butcher before that beef runs out and buy a different type of meat to add variety to your diet.

Pork and lamb come in smaller portions so you can get a full side of these meats. A side of pork weighs around 30kg/66lbs and (locally) costs about $7-$8 a kilo.  So a side of pork will cost about $240. A side will give you leg roast, shoulder roast, chops and sausages. If you can add that to your freezer while you still have beef, you'll be serving up a wide variety of meals.

If lamb is your preference, that too comes in a smaller side, about 20kg, at a cost of around (locally) $9 - $10 a kilo. If you bought the same thing at Wooloworths, you'd pay well over $20 a kg for lamb steak, chops or cutlets. In a side of lamb you'll get leg roast, loin chops, shoulder chops, chump chops, the lamb flap, shank, fat and bones.  Again, if you can get one of these into your freezer while you still have a selection of the other types of meat, you'll have the equivalent of a small butcher shop in your freezer.


Maybe you can form a small buying circle and get a small selection of beef, pork or lamb divided up between all of you. Or if your group is a large one, get a side of beef and a full lamb and pork. You may be able to do a better deal with your butcher to supply that kind of order.

Please note: all the prices and weights I've written about are in my local area and will vary according to how far the meat is transported and how much rain has fallen over the pastures. When you're looking around for a suitable butcher, ask where the meat is from and was it raised in a pasture, as well as the price. In Australia, most cattle and sheep are free range but you have to ask about pork and chicken. I prefer them all to be free range.

The butcher will expect you to say how you want the meat cut, if you want sausages or mince/ground meat, and if you want to take the fat and bones. I always take the bones but not the fat but if you're a soap maker, maybe you want to experiment with rendering the fat down to make soap. The decision is your and you have to make up your mind before you place your order.  When I make a bulk order of beef, I usually say I want some roasts, silverside, steak, sausages, mince and the bones. If you're buying with others, tell the butcher that so he knows how to portion everything and when you pick up the meat, or have it delivered, the meat will be packed in plastic bags as you ordered.

Don't expect to make an order for bulk meat and go in to pick it up that day.  Generally you'll need to order about a week before you want the meat because the butcher will have to order extra meat in to cover the order.  When it arrives, it's usually hung for a while and then it has to be cut according to your requirements. It's not a fast process, so remember that and give the butcher plenty of time to give you what you ask for. So as you can see, when it's explained it's not so overwhelming or weird. It's just a different, and I think better, way of buying meat. Make friends with your local butcher, say what you want and ask the butcher to give you an estimate for that order. I'm sure you'll be surprised at the savings that can be made.

Have you bought meat in bulk? How do you do it? Are you part of a large order with a friend or do you go solo?


SHARE:

28 January 2015

Financial recovery after the holidays

We didn't go over budget during the holidays but there have been many years when we did. If this has happened to you and you're now facing a lot of unwanted bills, I hope we can help. I invite all the readers here to join together to help everyone who needs to get back on their feet again.  Every day, in emails and comments, I'm reminded that this blog has the potential to help people. If you're in a sound financial position, or if you're paying off debt successfully, I encourage you to share your knowledge to help fellow readers.


I hope there will be a number of you who comment with good ideas below. We all have our ups and downs in life. Today you might be helping someone recover from overspending, tomorrow it may be you or me who needs help.

Even if you have one or two incomes coming in, you will have to wait to work the time needed before you collect your pay, and when you do, will there be money leftover to help you get back on your feet? I think the best thing to do is to actively look for ways to make a bit of spare cash. And I guess that will take some work on your behalf but it's better than having to pay extra interest on your debt or fees because you can't make a payment.  Try to pay your mortgage or rent on time, as usual. If you can manage that, these steps to earn extra cash might make all the difference towards getting back on track.


Here are some of the things I would do if I needed to find some extra money:
  • Live off my stockpile for two weeks.  This would leave two week's food budget money to be put towards the holiday debt.
  • Declutter my entire house, shed and garage and have a garage sale. You're hitting two birds with one stone doing this - getting rid of "stuff" and, hopefully, paying off debt.
  • Eat vegetarian meals every second day for a month. This would free up two week's of money usually spent on meat, chicken and fish.
  • See if you can find a temporary job or freelance work.
  • If possible, if you're not on a contract or at the end of your contract, cut off services such as an extra phone, Netfix, pay TV etc to maximise your savings. You can reconnect again later (if you want to) when you're in a better financial position.
When you put in the time and effort and it starts paying off, make sure you put all that extra money towards your debt. Temptation is a terrible thing. Don't start thinking that the extra money is for spending. You've been down that track and now you're trying to repair the damage. Nothing can beat the feeling of being in charge of your debt and then being debt-free. So stop the guilt trip, just do what you need to do, pay off the debt and when you're back on track, continue to pay off whatever you can as fast as you can. Because when you have no debt, life will change and you'll feel that anything is possible. And maybe it is.

What are your ideas to get back on track after overspending?

SHARE:

26 January 2015

The best fast tomato relish recipe

Although I was busy on the weekend with this, that and the other, I wanted to make tomato relish to go with the corned beef I'd just cooked for our week's cold cuts. I thought about it for a while and decided that if I took a couple of shortcuts, I could make a decent relish in about 30 minutes, or close to it, of actual work. I checked my stockpile cupboard to see if I had the makings, and yes, I did. Octonauts to the kitchen pod immediately!


It's difficult to streamline preserving recipes because they need the time for the jars to sterilise and on the stovetop simmering while developing flavours. I'm not a fan of microwaved jams and relishes, this is as close as I get to a fast preserving recipe. My stockpile ingredient that made it all possible were four large (440 gram) cans of diced Australian tomatoes. When I knew I had them on hand, I knew I could cook and bottle the relish in the time I had allowed myself. There would be no washing and peeling of tomatoes, no cutting, just take the lid off and pour. I prefer to make relish with fresh tomatoes but I'd rather have this home made relish than no relish, so I just got on with it. Often, close enough is good enough.

Above: the vegetable, spice and vinegar mix, cooking.
Below: and then four large cans of diced tomatoes were added.

I got my Maslin pan on the stove, cut up five smallish onions, a couple of cloves of garlic, one hot chilli, finely diced with half the seeds, the green head of a new bunch of celery, finely chopped, one  finely chopped red capsicum, salt, pepper and two teaspoons of good quality curry powder. If you have no curry powder, use a teaspoon of cumin and a teaspoon of turmeric. Add a dash of cooking oil and sauté the vegetables and spice for about five minutes, stirring frequently. You want everything toasted, not dark brown. Instead of using the vegetables I used, use what you have in the garden or fridge. Zucchini, eggplant, more peppers, whatever is on hand will do in a relish, but I do think relish must have onions. Overall though, this is a good recipe for using excess vegetables.


Add the four tins of tomatoes, stir thoroughly, add ¾cup of balsamic vinegar (or any good quality vinegar) and ¾ cup of sugar (brown or white). Stir everything together, bring to the boil and allow to simmer for about an hour.  Stir the relish during the hour to make sure it's not burning.

The beauty of the maslin pan is that it allows ingredients to cook without burning, due to the thick base, and the wide top allows steam to easily escape. This assists in giving you a thick relish because much of the water in the tomatoes will evaporate off.  If you don't have a maslin pan, use a large saucepan with the widest top you have.


Twenty minutes before the relish will be ready, place washed, wide-mouthed jars in the oven to sterilise. The lids need to be boiled for ten minutes. The jars should be sitting open side up. Set the oven to 150C/300F and allow to heat for 15-20 minutes. Remove the jars from the oven, being careful not to touch the inside.

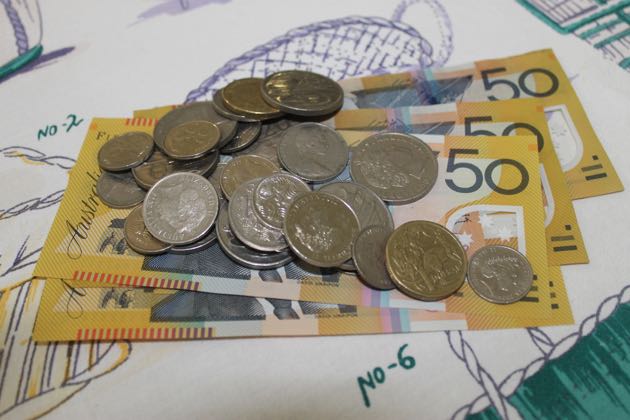
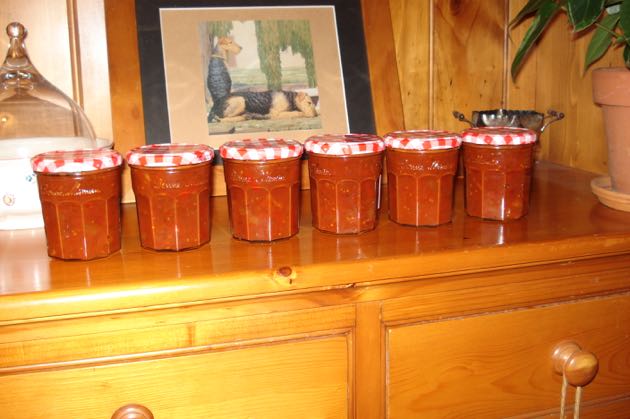
So the payoff for 30minutes work and about $10 worth of ingredients: nine jars of homemade tomato relish that will serve us well in the months to come. 

With the relish hot in the pan and the jars hot from the oven, use a canning funnel or jug to fill the jars. When the jars are full to the brim, use a tea towel to put on the lids and tighten. Turn all the jars upside down and leave them on the kitchen bench to cool overnight. If you sterilised the jars and lids properly and filled them with just boiled relish, the sugar and vinegar will help preserve them in the cupboard for about six months. I think the taste deteriorates after that. If you're not sure of your method, store the jars in the fridge. They'll keep very nicely for a few months.

I just checked the online Woolworths to see how much commercial relish goes for these days. It's anywhere between $3.71 and $7.51 for the Jamie Oliver jar. Pffffffft!  So if I were to buy these nine jars it would have cost me somewhere between $33.39 and $67.51. Mine took 30 minutes to make and cost about $10 for all nine jars. And I can tell you this with no doubt, my friends, mine tastes much better than anything mass produced, and I don't care what name they put on it. :- )

Tomato relish is a tasty addition to sandwiches, especially those with meat or cheese. It's excellent as a sauce for BBQed meats, chicken and fish. It's delicious with scrambled eggs or an omelette. If you have no tomato sauce, use the relish as the base layer on your homemade pizzas. It's certainly worthwhile giving 30 minutes to this very versatile relish. Of course it can be eaten the next day but if you leave it to mature for a couple of weeks, the relish will benefit from your patience.

What are your relish, chutney and sauce shortcuts?


SHARE:

23 January 2015

Weekend reading


Thank you all for the sweet and thoughtful comments left this week. They make me feel like I'm in the middle of something enriching, warm and significant. I hope you have the chance to relax over the next few days, even if it's for an hour, with your feet up reading the paper. What ever you do, enjoy it. xx ♥︎

Just a quick note about the forum. We encountered some problems when we tried to update the soft ware and that spiralled into another problem. We're working on it, it just takes time, but I'm hoping we'll be back by the weekend. I apologise for the inconvenience.

It's official - 2014 was the hottest year on record According to records kept by Central England Temperature series, 2014 was the hottest year in the UK for over 300 years.
Free February edition of Old Farmers Almanac
The UK's Women's Institute is 100.  Happy birthday girls!
We can't control how we die
The life of a dying young man is a lesson for all of us
Essential oils might be the new antibiotics
Urban gardens are blooming
Homemade charging station
Infant peasant dress - free pattern
Little girl's crossover pinny - free pattern
Baby boy's romper tutorial and free pattern
Newborn pants from upcycled jumper - free tutorial
Woodworking projects for beginners - there are some great project here


SHARE:

22 January 2015

A pictorial walk through the week

I thought I'd do a pictorial post today with few words. I think I talk too much sometimes. :- ) I hope you enjoy this look at photos that won't otherwise make it to your screens.

This is to show you just how untidy my hair is since my last hairdressing appointment last year some time. I forget when. Lucky I've only been out once since mid-December. I updated my photo over there on the sidebar;  I took it today, and yes, I was wearing the same top. :- )

So, what do I get up to on all these ordinary days of mine? Early morning tea and toast at 7am, although I'd already been up for three hours.

One Barnevelder egg. The girls have stopped laying so much during the hot and humid weather. We have 11 chooks and although we often get five or six eggs at this time of year, there are many days we get only one.
One of the many wonderful things about living this life is the variety of things I can do in one day. Here is another nightie being started.
 Of course, our daily bread is baked.
 And some pizza at the same time.
 
And then some fresh air and editing on the front verandah.
Lots of cherry tomatoes and a few green goodies to be picked.

The beginnings of another chicken casserole. Hanno had a sore tooth and this was all he could eat.
    
We had Jamie here with us all last week. I know all the Octonauts now.
And, naturally, I was sitting in the garden, watching over our domain. Happy to be here and wanting nothing else. Life's good. I hope yours is too. ♥︎


SHARE:

21 January 2015

Making elderberry drinks

Last week our elder tree (sambucus nigra) was heavy with berries. It's the first year there have been enough berries to do anything with. All the previous five years we've had plenty of flowers for elderflower cordial, but the berries dropped off before they were ripe. So we were really pleased to be able to pick a basket of berries and have the luxury of deciding what we'd do with them.

When Hanno was a little boy, his mum used to make elderberry soup, and he still has fond memories of that. We may make elderberry soup in the future but for now we decided on a summer drink that gave us a healthy boost. I made elderberry cordial.

For those of you who are looking to grow fruit trees, I think elderberry would be a great first tree. It can be a bit of a nuisance if it sends out suckers but it needs moist conditions for suckers to develop, so that doesn't happen often here.  When it does sucker, it's very easy to put out the suckers. Unlike many fruit trees, you can be picking flowers in the first or second year and here in our climate, we have berries in our fifth year. There are flushes of flowers all through the year but I'll have to see what happens from now on with the berries developing. Elder grows very well from cuttings so if you know someone with a tree, ask for a cutting. You can use the fruit for jam, wine, champagne, cordial, soup and immune boosters in winter. 

The workers, Hanno and Jamie, went out picking in the backyard a couple of days ago.  Hanno picked half the berries off the stalks. Traditionally you do that using a fork, I found it easier to do it by hand. You need to remove the berries without stalks as the leaves and stalks have a slight toxic quality and you don't want any in your elderberry delights.


Making elderberry cordial is very easy once you have your berries off the stems.  Wash them to remove any dust or bugs and place them in a saucepan. With a potato masher, squash the berries to remove the juice. Add a cup of water, bring to the boil and gently simmer for 20 minutes.


If you have a food press, pour the juice into the press and process the fruit to squeeze out all the juice. You'll end up with the pulp and seeds in the press and the juice in the jug. If you don't have a food press, mash the berries to remove as much juice as you can, then strain them through a fine sieve or a sieve with a muslin cloth over it. Press out as much juice as possible and discard the seeds and pulp. Our chooks had the leftovers and loved them. 


When you have the pure juice, add the juice of one lemon, pour it back into the saucepan and for every cup of juice, add half a cup of sugar. Bring to the boil, stirring to prevent it from burning. When the sugar is completely dissolved, allow to cool and pour into a clean bottle. If you want to keep the cordial for a long time, sterilise the bottle.

Elderberries are full of antioxidants, vitamins A and C, iron, magnesium, phosphorus and calcium. To make elderberry syrup for colds and flu you'll need:
  • 2 cups elderberries, de-stemed and washed
  • 2 cups water
  • ½ cup raw honey
  • 2 tablespoons fresh ginger, grated
Add the berries to a medium saucepan and, with a potato masher, mash the berries to release as much juice as possible. Add the ginger and water and bring to the boil. Gently simmer for 20 minutes. Process as above with the food press or a sieve, return to the saucepan and add honey. Stir until it's completely dissolved.

Cool slightly and pour into a clean bottle. If you want to store it for a while, sterilise the bottle.

I keep elderberry cordial in the fridge and dilute it with cold water or cold mineral water. It makes a very refreshing drink and the cordial costs a small fraction of what you'd buy it for in the shops.  If you don't have enough berries to make up some cordial, freeze the berries as you pick them and make it when you collect enough. The berries and the flowers are still very useable after they've been frozen.

Do you grow elder or have access to it? What are your favourite elderberry recipes?


SHARE:

19 January 2015

Cleaning the pantry

Well, after giving myself a week to do it, I finally got to the pantry cleaning yesterday. I usually leave things like that to the last minute because I perform better when I'm under pressure. Hanno and Jamie were at the market at Caloundra so I took the opportunity to empty both the middle shelves, the ones most of the things are on.  Luckily the kitchen bench is right next to it so it didn't take long to do one shelf, then the next.  

Before and after.  This is the shelf I'd like to add a back step to. 

I went through everything, made sure there were no lurking pantry moths or weevils, wiped the outside of all the containers and started loading the shelves up again.  I'm really pleased I didn't throw away too much food. I hate doing that. I had to bin a small amount of grain flour because it had a slight smell of rancid flour about it. A few items had small amounts in two containers so I combined them and washed the spare containers.

 Before and after.


This is the entire cupboard, before and after. Hanno does top and bottom shelves for me.

When I put everything back again I wished I had one of those shelf steps that you can use to elevate food at the back. I'm not very tall so it's a problem sometimes to see what's there and reach it. The next time I'm out I'll look for something useful that will fit neatly into the cupboard.

But now I'm happy I have a neat and tidy pantry again. I guess we all have different reasons for wanting our pantries to be clean and functional. For me, it gives me a feeling that I'm doing my job well, my job as a homemaker. It also helps me get through my cooking easily because it's all there, laid out, ready to use. I hope you had the chance to clean your pantry or stockpile too. It gives me such a feeling of satisfaction that I have to keep looking at it whenever I'm in the kitchen.  

If you have before and after photos, leave a link below so we can all go to your blog to see your work. This should provide some motivation for others who haven't done their pantry yet, who want to, but can't quite get there. Let's see them try to resist when we all show our photos.  :- )


SHARE:

16 January 2015

Weekend reading

 Tomato relish for the stockpile and lemon juice for the freezer.

I haven't done my pantry work yet but I have taken the "before" photos. I hope everyone who joined in on this challenge are progressing well with it.  If you're not sure what I'm talking about, the info is in last Monday's post and it's not too late to join if you want to. I hope you all have a great weekend. I'll be busy writing over the next few days but I'll see you all, with my pantry spick and span on Monday.  Take care. ♥︎

30 everyday products you can make instead of buying at Walmart
How to freeze eggs
Healthy Dinner Recipes for under $1 a serve
34 ways to waste less food
Knitted baby bloomers
Sewn baby bloomers
Look at these little booties. They are the same as the ones I made in felt.  I'm going to make a couple of pairs of these,
I just love this blog - this is the post that brought me to it
Five things to purge from your bathroom today
The potential of porridge
Redefining the decades  New words for "old"?
I forget how I found Debby's blog, Cooking up a Storm in a Teacup, but I'm glad I did. I really like her mix of knitting, tea, open fires and ordinary life.

SHARE:

14 January 2015

Healthier and cheaper cold cuts

It often pays to look at different ways to supply healthy food for your family.  I don't like buying cold cuts from the supermarket or the deli because I prefer to do the cutting myself. I'm sick of buying expensive meat only to have it turn slimy or smelly in a day or two and have to throw it out. Recently Hanno bought a small food slicer. He likes his rye bread cut fairly thin and a meat slicer does the job very well indeed. Our slicer has a wide range of cut widths, from wafer thin to extra thick. So when we had that slicer sitting there I started thinking about what else I could slice with it. Naturally, cold cuts jumped out at me.

Even though it's a meat slicer, it also cuts bread perfectly. That's my homemade bread in the slicer above. Homemade bread is often difficult to cut but it slices through my bread like butter on the slicer.

We don't eat nearly as much meat as we used to. I was vegetarian for eight years and even though I felt better when I started eating meat again, I didn't go overboard. But I do like good cold cuts with salad during summer and I like the occasional sandwich with either cold meatloaf, corned beef or roast beef, with a touch of homemade relish or chutney. The slicer does the best job at slicing the meat and our homemade bread so it not only tastes good, it looks good on the plate.

Cooking meat at home for your cold cuts is much more economical than buying it pre-sliced at the deli. So let's look at the meat to see what savings may be had. Here in my local Woolworths and Coles the prices are much higher for the sliced cold cuts you buy at the deli section. For instance, sliced and cooked corned beef at Coles is $31.90 per kilo/2.2lbs but at the same shop you can buy uncooked corned beef for $7 per kilo. It just needs to be boiled and you'll have a fine piece of meat that will sit in the fridge for a week and serve you well for lunch boxes. If you have a bit too much corned meat, then serve it up for a quick dinner one night with either salad or vegetables.


It's a similar story for roast beef. Sliced from the deli, it's $23.98 per kilo, if you buy a piece of raw Heart Smart topside beef suitable for roasting and do that in your own kitchen, you'll pay $13.99 per kilo, or $11 for a lesser grade meat. Roast pork as cold cuts is $23.99 per kilo, buy it raw and slow roast it yourself at home - $8 per kilo. You can also make up meatloaf, chicken loaf and tuna loaf, all ideal as sandwich meats and they'll be cheaper and contain no preservatives or additives if you make them at home rather than buy them precooked at the deli.

Cooking at home allows you to add your favourite herbs and spices, reduce the salt content, cut off the fat and cook it how you like it - rare or well done. Meat that you've cooked and stored in the fridge at home will last longer than cold cuts from the deli and I can slice just as much as I need. And the bonus here is that I can clean the blade every day, or between cutting jobs. I don't know how often they clean the slicing blade at the supermarket, or what they clean it with, but here I use Ecostore detergent, in clean water, with a cotton dishcloth and then it is rinsed in clean water and allowed to dry. Even though I've stood for a long time waiting at the deli counter over the years, I've never seen anyone clean the slicer blade. It's probably something that's only done after hours. I'd prefer it was done between slicing jobs.

Our slicer is a Sunbeam, and btw, I'm not sponsored in any way for this post. Hanno bought it last year and so far it's been excellent. I think it was around the $120 mark but if I keep on cooking and slicing my own cold cuts, it will pay for itself in a few more months. Do you have a slicer at home? Are you cooking your own cold cut meat?


SHARE:

12 January 2015

Pantry challenge


I did a lot of baking over the holidays and now my pantry looks neglected and untidy. I looked in there yesterday morning when I was starting to prepare cinnamon rolls and I could see small amounts of flour, dried fruits, lentils and other pantry food in large containers. I need to reorganise it, check all my jars, wash some of them and freshen up the contents so I'm ready for the year ahead. Even though I'm very busy, I know if I take the time to do this, I'll reap the benefits later on because the pantry will be easier to use.


I could be wrong but I doubt I'm the only one with a pantry that needs some attention after the holiday season. I wonder if yours does too. I challenge you to thoroughly clean out your pantry cupboard, check all your containers and organise the jars and containers so you can easily see what you have there.  I reckon it will take me a week to do mine. Not that the work will take a week but I'm sure I'll be able to get to it, do the hour or two of work it needs and have a photo ready to show you next Monday.


Our stockpile is in good order. We cleaned it out and reorganised everything just before Christmas. Now its just the pantry that needs some attention and I'm ready for it. If your pantry is fine but you need to work on your stockpile, do that instead of the pantry.


Who is up for this challenge with me?  I need you to take a photo of your pantry now. No tidying up before you photograph it.  We're all in the same boat and we're doing something about it. There is no shame in that, my friends. Just to recap, let me know in a comment if you're in the challenge, then take a before photo of your pantry. Sometime over the next week you'll have to clean out the pantry and get it in ship-shape order. Take another photo when you're satisfied with your work.

Next Monday I'll put up my before and after pantry photos and write my follow-up post here. When I do that, you can either write a post on your own blog with your photos, or load your pantry photos on the forum in a thread I'll start there (next Monday). Either way, all those photos of pantries should inspire us to take on a few other organising projects before the year gets into full swing. I hope you'll join me.  ♥︎


SHARE:
Blogger Template by pipdig