Long gone are the days when we frequently replace bought items that we use at home. Hanno is on a pension and I do paid work infrequently, so the money is not there any more. Now we look after what we own. We buy the best quality we can afford then we look after it knowing that the time and effort we put in will extend the life of the product. We see this as an important part of our lives now, it certainly saves us money, but it also lightens our footprint on the earth.
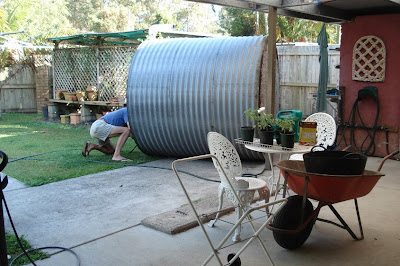
This philosophy applies both inside and outside the home. We have regular times throughout the year when we check and maintain. I wrote about this recently in the spring cleaning posts. Since then one of our water tanks ran dry so it was the perfect time to tip it over, look inside and made sure everything was as it should be.
We bought this tank when we first came to live here 12 years ago. It's a 5,000 litre corrugated iron, lined tank, made locally by a small business that is no longer operating. The workmanship on the tank is excellent. All these years later, after sitting in the sun and surviving cold winters, it is still just like it was on the day we installed it.
Cleaning out a tank is a simple procedure. When it is completely empty, disconnect it from the downpipes, the pump and hose and then find someone to help you tip it onto its side. If you need to look inside, and Hanno always NEEDS to do this, rest it on the ground with some bricks against the side to stop it rolling. You may need your hose in hand while you do this, depending on how much gunk is in there. Have a good look, check for light coming in which will indicate a hole, or at the very least, a split in the tank.
When you've done your inspection, you can give it a good hosing and clean it out thoroughly.
The amount of gunk in there will depend on where the tank is located. If you have a lot of trees near your home, some leaves will be in the tank. Depending on the efficiency of your filter where the tank is connected to the downpipe, you'll have whatever has been on your roof since you last cleaned the tank. This might still look like leaves or bird feathers or insects or may have decomposed and settled as black silt at the bottom of the tank. I drink our tank water sometimes. I didn't like the look of that silt pouring out of the tank. But I'm still here to tell the tale so I'm either as healthy as a horse or the silt looks a lot worse than it is.
When the water starts running clear, let it drain out completely. While that is happening, check the base of the tank as well as the ground it is sitting on. Many people place their tanks on a cement base. We've always used compacted crusher dust, held in by a circle of bricks. That has done the job perfectly for us.
Then raise the tank back to its position and reconnect it to the roof and to the hose outlet and pump, if you use one. Then you just have to be patient and wait for rain to fill it up again. For me, that's the most difficult part. I like things to happen NOW.
Then raise the tank back to its position and reconnect it to the roof and to the hose outlet and pump, if you use one. Then you just have to be patient and wait for rain to fill it up again. For me, that's the most difficult part. I like things to happen NOW.
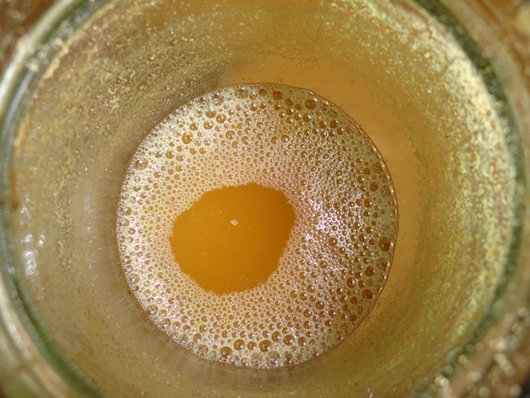
And finally, a photo of the ice cream we ate last night. Hanno said he'd been waiting for it all day after reading the blog yesterday morning. Unlike me, Hanno waits for things. :- )


.jpeg)


.jpeg)
.jpeg)
.jpeg)
.jpeg)
17 Comments
That ice cream looks delicious! I'm going to have to make some.
ReplyDeleteI've been thinking about putting in a water tank under our downspout, but I'm a little concerned about any chemicals that might have been used in our roofing. I'm not very knowledgeable on the subject, but isn't tar or creosote sometimes used? Is that what your filter is for, or is it just to keep large objects from falling into the tank?
Thanks,
Megan
Im a new reader to your blog which I find fantastic!Keep it up.I love how your icecream turned out too-so yummy looking.
ReplyDeleteHello, I have just found your blog through Simple Frugal Co-op and I would just like to say how much I am enjoying reading all your posts - I have plenty of time to do this right now as I am confined mostly to bed and home with acute asthma/bronchitis! Reading all your inspiring words has certainly helped to take my mind off my illness and let my thoughts drift to what could be when I recover so many thanks, I look forward to reading much more.
ReplyDeleteHi Megan. Yes, you're right to be cautious. We have a steel roof so we have no contamination except for what lands on the roof and what particles are in the air. We had a cane toad on our roof once! A crow picked up a dead toad and dropped it on the roof. Thankfully we found that quickly.
ReplyDeleteSo find out what your roof is made of and do some research. If you can harvest your rain water it is a fine thing to do but you don't want to save water that is contaminated.
Hello Rhonda, I have been reading our blog for a few months and find it really interesting and motivating. We have had rain water tanks for the past twenty years at least.The tanks are our only source of water.Our theory is that the bugs in the water help keep us healthy as we absolutely never get gastro intestinal illnesses! The gunk sinks to the bottom and the water comes to the tap from above that. If you think about it there are much worse things, I am sure, at the bottom of the large storage dams where most urban water comes from.
ReplyDeleteAnne
Wow, okay after seeing a picture of the ice cream, I really have to try this now! :)
ReplyDeleteHi Rhonda,
ReplyDeleteI have been reading your post for about 8 months now. I don't have a blog of my own but always sign my name even though I am anonymous. I had the feeling that something just wasn't "right" or that something was missing in my life. It seemed like life was just a blur. Last fall I began reading your blog. I read everything I could get my hands on that related to cutting back, simplifying and being frugal. I had been coming home exhausted and "depleted" from my day as a Preschool Teacher- (even though I love my job.) After much thought, prayer, and discussion with my family I spoke to my supervisor and worked out a new work schedule. This year when school starts here in the USA, I will be working two days a week. I look forward to more time for my family and more time in my home- being true to myself being a homemaker. Your words have given me the most gentle comfort and encouragement through these months. Thank you from the bottom of my heart!
Angie
Welcome Denny and Lisa!
ReplyDeleteAnne, I have seen dead cows floating in dams that supply towns. I'm quite happy to drink our tank water.
Hi Bob and Debbie!
Oh, yes, if there is anything I have a hard time with is waiting.
ReplyDeleteBut that ice cream might make it worth the wait if it is the reward. :)
Just think someday you may have grand babies to help Hanno with this job.When our boys were younger they loved helping their Papa scrub out the horse troughs esp. on a hot summers day.Loads of fun and giggles.
ReplyDeleteRois
You and I are so alike Rhonda! Re: waiting for things; my husband Brendan and I are the mirror image of yourself and Hanno! I like to think that the polar positions of Brendan and I ensure that we both have to compromise at some point, and that we're more likely to make less extreme decisions. It's a shame that such opposing views/personalities amount to conflict (not the agressive sort) as that means no decision is ever made easily!
ReplyDeleteReading your post reminded me that our 2 big rain barrels need to be tipped over and rinsed as they are looking 'gunky' inside. I was surprised to see some shingle particles in there and not sure how worried I should be about that.
ReplyDeleteGood job done! We have no mains water so rely on our tanks..13,000 gallons of water.The tanks are too big to hand clean and the one we recently replaced had a few barrowloads of gunk at the bottom, wonderul tonic for the garden! We filter the water for drinking but are fit and healthy,never get gastro, flu,colds or infections.Maybe it's the healthy lifestyle as much as the tank water.A recent visitor refused to drink any water for several days..now that's not healthy!
ReplyDeleteI made some raspberry ice cream earlier this summer and it was gorgeous.
ReplyDeleteWe have our own spring water here and the taste of it puts you off the normal tap water other folks have in their houses. Plus - it's free - we don't have to pay water rates.
Hi Rhonda Jean
ReplyDeleteGreat post. And funny ;D . Is it me or does your water tank look like a gigantic tin of baked beans lying on its side? :D
Must try that ice cream! Think I'll add some free foraged blackberries to it which have just come up ripe in our area of the world!
Jennifer
HomeMattersMost
I've always wondered how you cleaned water tanks! I know you can also pay people to come and pump the sludge in the bottom out, but your way looks much simpler. If our water gets down much lower, we'll be able to do the same thing.
ReplyDeleteIt is such a good lesson to make do & repair, to buy quality & support well made products. Thank you for the reminder!
ReplyDeleteThat ice cream looks lovely!
I welcome readers' comments. However, this blog never publishes business links or advertisements. If you're operating a business and want to leave your link here, I will delete your comment .