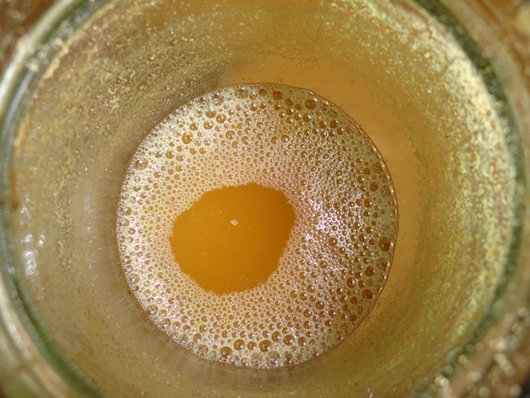
I'm sorry the quality of this photo isn't what it should be but it's the only one I have. I only had my phone with me to take the photos and in this one I pointed it toward the overhead light. The rest of them are much better.
Our much loved daughter-in-law, Sunny, invited us over for lunch on Saturday. Outside it wasn't so good, the rain was pelting down, but inside Sunny had prepared a tray of perfectly cut fresh vegetables, prawns and chicken, as well as a few sauces. We were having rice paper rolls. It's a great way to prepare a fresh and healthy lunch for a group because everyone makes their own rolls. It was absolutely delicious. Afterwards I helped Sunny peel garlic for kimchi which she'd already started. Sunny is Korean and she's a chef so I thought you might like to know how to make authentic Korean kimchi. I didn't do anything except test taste the batch I was to take home and peel some garlic. :- )

It's important to get the cabbage right. Kimchi is made using wombok - Chinese cabbage, and this was a one-wombok kimchi. Earlier in the morning, Sunny had cut up one whole wombok and salted it using ½ cup rock salt diluted in 1½ cups cold water. Pour that over the cabbage and using your clean hands, move the cabbage around, making sure the salted water makes contact with all the cabbage. This process is used to draw water out of the cabbage. If you don't do it, the water will come out anyway, but it will come out when the kimchi is made and it will result in a watery mix and a watered down flavour. Sunny said it's best to do this on the morning when you want to make kimchi, not overnight, because you can keep an eye on it so it doesn't go too soft. You don't want crisp cabbage but it should still have some crunch. The salting process will take about five or six hours, when the cabbage has shrunk in the bowl quite a bit and is soft but still has a crunch, that is when you can wash the salt off the cabbage and thoroughly drain it. It should look like the bowl of cabbage above.
While she worked, Sunny told me about how Koreans have kimchi days similar to the tomato sauce making days Italian families have. The grandmas organise the families and will make a 100-wombok kimchi, mainly with the help of the daughters-in-law. Sometimes they will make a 500-wombok kimchi and those larger quantities are stored in huge stoneware pots, which are buried until another pot is needed.
About an hour before you need it, mix one cup of plain (all purpose) flour in two cups of water, in a saucepan. Bring the mix to the boil, stirring as it heats, and when it's thick, take it off the heat and allow it to cool completely. When the cabbage is ready, place three medium onions and about 20 cloves of skinned garlic in a blender (or whatever amount of garlic you want to use). Add a small amount of water and blend until everything is broken up but not quite smooth. Add that to the cooled flour mix. Above you can see Sunny mixing her onions and spices into the flour mix.
The little bowl on the right is the flour and spice mix for the kimchi I took home. It had much less chilli than Sunny's kimchi. She likes hers very hot.
You can also add one tablespoon of sugar, a teaspoon of ginger powder or fresh ginger if you have it, as much gochugaru (Korean pepper flakes), fresh chilli or chilli powder as you like, Daikon cut into fine strips and green onions. It really depends on the season - here we have no daikon at the moment so Sunny used the green ends of green onions instead. Use your common sense by adjusting the amounts of spice and garlic according to your taste. Sunny also used fish sauce, about a tablespoon full, and mixed it in with the flour mix. When you have your flour and spice mix ready, pour it over the cabbage and, using your hands again, rub it into the cabbage and make sure it covers the entire cabbage. You can see Sunny doing that below, with a gloved hand.

Sunny gave me a one litre plastic bucket of the fresh kimchi to take home and this is it below. When she filled it, it came up to the lid but over the following hours, water continued to drain from the cabbage and it sunk down in the bucket. Kimchi is a fermented dish, similar to German sauerkraut, and at this stage it must sit, covered, on the kitchen bench for the fermentation to start. I left mine out for about 30 hours but it will depend on how strong you want the flavour of the kimchi to be. The longer you leave it, the more the probiotics will build up. It can stay on the bench for up to three days. Like all fermented foods, it contains the beneficial bacteria your body craves.
When the bucket of kimchi had reduced in size a bit, after about 30 hours, I put it in the fridge. It was covered with a lid and Sunny wrapped the entire bucket in plastic wrap as well, to make sure the smell didn't seep out into the fridge.
You can see from the photo above that the juices are red from the chilli and sauces. I tipped the bucket upside down a few times to marinate all the cabbage.
And now it's sitting happily in my fridge alongside my Maleny Dairies yoghurt, a half jar of home preserved pickled beetroot, a jar of golden calendula petals macerating in olive oil and the other strange goodies that identify the fridge of a home producer. I'm pretty sure yours looks similar. And that reminds me, this recipe is okay to use if you're lacto-fermenting too. Sunny said her friend makes her kimchi using Yakault - the little probiotic drink. If you have whey add some to this if you want to add Lactobacilli.
You eat kimchi on its own as a snack or as a side dish for BBQ or fish. I want to use it to make
these kimchi devilled eggs. I think they look delicious. I just have to wait for a while for the brew to mature. Here are a few more ideas:
10 things to do with kimchi. I hope you can make some up to try it.










.jpeg)


.jpeg)
.jpeg)
.jpeg)
