Even if you're a new baker, this should be within your capabilities because the dough is made in a bread maker and then baked in the oven. But you can make them by hand as well. After mixing, you must knead the dough for at least ten minutes. Kneading the dough develops the gluten which helps the bread rise.
CHEESE ROLLS - makes ten large rolls
You'll need:
You'll need:
2 heaped teaspoon dried yeast
About 1 ½ cups half water/half milk - warm You might need more but start with this amount and see how you go. It will depend on your flour and the humidity in the air.
2 teaspoons sugar (optional) it adds extra flavour.
2 teaspoons salt
4 cups of baker's flour - also known as high protein flour or strong flour. You can buy this at the supermarket or your local shop selling loose flour and dry goods. I used white flour for these rolls, you can use whatever baker's flour you like. Soon I'm going to do a trial with spelt flour.
2 teaspoons of bread improver. I generally don't use this in my bread but adding the cheese weighs the dough down and it needs some help to rise. Here is information about bread improver. You can buy it at the supermarket. If you don't want to use bread improver, use 2 teaspoons of cornflour, but you won't get the light dough the bread improver will give you.
1 tablespoon soft butter or olive oil
Cheese of your choice - I used eight thin slices of Jarlsberg and a sprinkling of parmesan. You use 1½ - 2 cups of grated cheese and add a sprinkling of ham if you want.
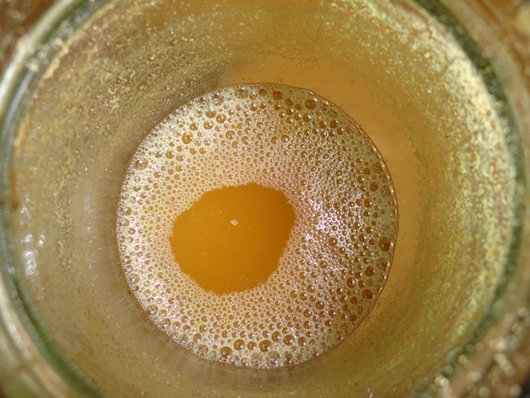
Before you start, warm one cup of half water and milk to blood temperature, then add the yeast and sugar and stir it well. Leave the yeast for five minutes to start blooming. If the yeast is active, after a few minutes, bubbly froth will start developing on the top of the liquid. If that doesn't happen, you'll probably need to buy new yeast.
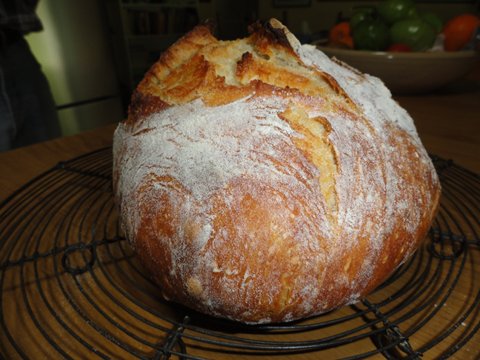
You can see here how fine the crumb is on these rolls.
In the bread maker bucket and in this order, add the salt, flour, bread improver and butter/oil. Add the yeasty milk and turn the machine on to the dough setting. Wait there and watch it and add more warm water and milk to make a moist, but not wet, dough. You have to judge how much liquid to add, it could be more or less that I've allowed for. Some flour needs more liquid, some needs less, and the weather conditions make a difference too. When you're satisfied that the dough is right, leave it to run through the cycle.
When the dough is ready, remove it from the machine and place it on a floured surface. The dough will be fairly soft and pliable because you added the butter/oil. Knock the dough back by flattening it out with your hands and when you have a rectangle, roll with a rolling pin. If it's easier for you to handle half, cut the dough in two and work with two seperate batches. You want it to be between 1.5 - 3 cm or ½ - 1 inch thick. The rolling process is similar to making cinnamon rolls or a Swiss roll. Sprinkle the cheese over the top of the dough, right up to the edges, and then roll the dough into a big sausage shape. Try to keep the shape together, you may have to add another sprinkle of flour to stop it sticking. With a sharp knife, cut the sausage into 10 even slices and place each slice flat on your baking tray.
Allow the dough slices to rise for about 20 minutes - depending on the temperature of your kitchen, longer if it's cold. Ten minutes before you put the tray in the oven, preheat your oven to 220C/425F.
Allow the dough slices to rise for about 20 minutes - depending on the temperature of your kitchen, longer if it's cold. Ten minutes before you put the tray in the oven, preheat your oven to 220C/425F.
When the slices have risen, place the tray in the oven and turn the temp down to 200C/395F. Bake for about 15/20 minutes or until the bread is golden brown and it smells like bread.
These rolls are delicious and if you use the bread improver, they'll be light with an excellent crumb, even with the cheese layer. Here is the link to our thread at the forum. If you make the rolls and take a photo, add the photo over at the forum and if you have any questions, there are many experienced bakers there to help you along and I'll be in and out during the day to help as well. I hope you try this.
I didn't think to take a photo when I was rolling the dough out but this photo shows a cold roll cut in half so you can see it's just a simple roll with a cheese layer.
These rolls are delicious and if you use the bread improver, they'll be light with an excellent crumb, even with the cheese layer. Here is the link to our thread at the forum. If you make the rolls and take a photo, add the photo over at the forum and if you have any questions, there are many experienced bakers there to help you along and I'll be in and out during the day to help as well. I hope you try this.





.jpeg)


.jpeg)
.jpeg)
.jpeg)
.jpeg)
15 Comments
They look really delicious Rhonda:)
ReplyDeleteThey do look like the best cheese rolls!
ReplyDeleteI registered to have access to your forum and rec'd an email that informed me that my account had been activated and then minutes later rec'd and Mail telling me that I had been rejected.-ugh :-( Any suggestions? Thanks
ReplyDeleteSorry Sandra, I'll look into it right away,
DeleteSandra, please email me with the name you registered under. rhondahetzel@gmail.com
DeleteI love spoiling My husband with his favorite foods sometimes too, such a simple gift! :)
ReplyDeleteYour bread looks delicious!
xx
Thank you for sharing Rhonda. I love making bread - I think it must be a thing about yeast. Merry Christmas to you both and all the best for the
ReplyDeleteNew Year. Keep up the good work.
These look wonderful, Rhonda. I will try them. I had to laugh at the comment, though, about making them by hand. I have been making bread by hand for years. There was a long,long time when there were no bread makers. I don't think I would know what to do with one; and making bread by hand is so satisfying.
ReplyDeleteHi Rhonda
ReplyDeleteThank you for that recipe - all of your recipes are delicious and very welcome!
I just wanted to leave you a comment as I thought of you while watching a T.V programme recently. It was called 'How to eat well for less' (BBC) and basically Gregg Wallace and Chris Bavin help families who spend too much on their food shop eat well for less. They also give them healthier recipes rather than buy convenience food - win, win. The last programme that I watched was about the 'Guest' family who ate a lot of what they called beige food (ready made food like chicken Kiev). When the mum started the process she found that she really enjoyed cooking and providing healthy meals for her family and said that she felt like she was fulfilling her role and said "I feel like a domestic goddess and want to buy an apron"!! This is the point when I thought of you because this mum 'got it'. She was spending a lot less money on her food bill but also cooking from scratch healthy meals for her family - bingo!
Sorry for the long comment Rhonda!
It is raining cats and dogs here in the U.K - I hope that you have better weather!
Eve xx
We make these too and sometimes add marmite with the cheese. They are great with soup :)
ReplyDeleteSounds delicious ! You make the best breads... Merry Christmas, my friend. xo
ReplyDeleteWhat is bread improver? I am in the US and I have never heard of it. Is it like gluten?
ReplyDeleteIt's not gluten flour, there's a link in the post explaining bread improver.
DeleteWhen you say cornflour, do you mean the white powder sometimes used to thicken gravies, or finely ground cornmeal, the kind used for corn breads? I'm in the US and we don't often talk about corn flour. (But I have both products in the house so I could make these babies TODAY...if I knew which one to use.)
ReplyDeleteIt's the white powder, Teresa.
DeleteI welcome readers' comments. However, this blog never publishes business links or advertisements. If you're operating a business and want to leave your link here, I will delete your comment .