Bread is one of those foods that, when made with your own hands, gives a great deal of satisfaction and delight. It's only flour and water but it symbolises so much. I bake bread most days and use a variety of flours that I buy in bulk. Often I make a sandwich loaf because we use most of our bread for lunchtime sandwiches and for toast. Every so often I branch out to make a different type of loaf. I have tried sour dough in the past but I've not been happy with any of them. I'll continue to experiment with sour dough because I like the idea of using wild yeasts and saving the starter over a number of years to develop the flavour and become a part of the family.
However, the loaf I've been branching out to most often is just a plain old five minute bread. By five minutes I mean it takes about five minutes actual work to prepare but it's the easiest of all bread to make and to get consistently good loaves from. If you're having people around for lunch or dinner, this is the bread you'd bake, not the plain old sandwich loaf.
I'm sure there are many ways to make this bread, this is how I do it. It is the old New York Times recipe.
Late in the afternoon before the day you want the bread, take a large bowl and measure in three cups of flour - I'm using organic unbleached white and a German rye with grains at the moment. Either of them will do, or any flour you have on hand, including plain/all purpose flour. Add ¼ teaspoon of dry yeast and a teaspoon of salt, or less if you're on a salt restriction. Mix the dry ingredients together. Add 1½ cups water and mix the ingredients together with your hands until all the flour and water have mixed together completely. This mixing (not kneading) will take less than a minute. If you have to add slightly more water or flour to get a moist dough, do so. The amount of flour and water you use will depend on the type of flour you use, and your climate. Flour is effected by humidity and you use less water in humid weather.
Cover the bowl with plastic wrap and leave it on the kitchen bench overnight. During the night it will puff up and expand, but not as much as your regular bread dough does.
The next day, turn the dough out onto a floured surface and knead it. You want it to look smooth and to all come together, but this will only take a minute, no longer. Form the dough into a tight ball, with a smooth top and a folded bottom and place this ball on a clean tea towel - just to help you carry it over to the oven.
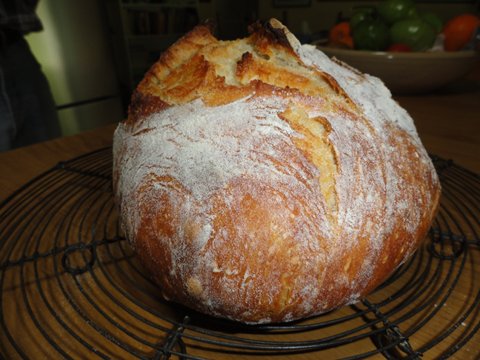
About 15 minutes before you're ready to put the dough in the oven, place a cast iron dutch oven, with lid, in the hot oven and let it heat up to about 260C/500F - or as high as your oven will go. When it's really hot, slide the oven shelf out slightly to give yourself a bit of room, bring the dough over to the oven and plop it into the dutch oven, smooth side up and snip the top of the loaf with a pair of scissors. This helps the loaf rise and will give you that rustic look you want in a loaf like this. Put the lid on the dutch oven, close the door of your oven and let it bake for 30 minutes. After 30 minutes, turn down the heat to 200C/390F, remove the lid and let cook for another 15 - 30 minutes (depending on your oven).
Same recipe using rye and grain flour.
The type of container you bake in is important. It must have a lid to give the loaf a steamy environment in which to cook. The container needs to get really hot because it's the very high heat when you start that gives the bread a great oven lift so it bakes as a tight ball and doesn't spread out over the bottom of the pan. I don't grease my dutch oven but I do put in a small disc of baking paper on the base that I don't change every time I bake. You can also use a pyrex bowl with lid or an oven-proof stainless steel pan with lid but I don't think they work quite as well as the cast iron. They will give you a good loaf though.
For a larger loaf, use 5 cups of flour, 2½ cups water, 1½ teaspoons salt and ½ teaspoon dried yeast.
Using this method you'll great a great loaf for very little effort and even though it's not a real sour dough, it looks like one and it has a good taste. The crust is crunchy and chewy but it goes softer as the loaf cools. It has a good flavour but it's not as developed or complex as a good sour dough loaf. Still, for an everyday loaf that doesn't take much effort, this one is a beauty. I hope you try it.


