There are many little cost cutting measures you can take in a frugal home. Most of them, when you see them as an isolated unit, look too insignificant to bother about, but add them all up and you'll make good savings. Saving grocery money is an important goal for most homemakers; it means paying off more debt and all the good things that come from that. So being able to make two cups of yoghurt into two litres/quarts might seem small, but it will save you money and learning how to do it adds to your skill base, and that, my friends, is important.
Live food can multiply, it's one of its numerous benefits. I know many of you use yoghurt to make new yoghurt but there are many new readers here and quite a few young homemakers so I would like to revisit how to make yoghurt at home. I encourage you to add your method of making yoghurt in your comment. My way will not suit everyone and you may encourage someone to learn this skill.
You can do this two ways - either buy a powdered yoghurt starter or just a tub of natural yoghurt. The yoghurt must be natural with no gelatin added. I bought the best yoghurt in my area - Maleny Natural, a cows milk yoghurt that has won gold medals at both the Sydney Royal and the Ekka shows. It cost $3.50 for a 500 gram/16 oz tub. Check the use by date and get the freshest yoghurt you can find. This is important you need live beneficial bacteria for this to work. You could also use sheep or goat yoghurt as a starter as long as it contains a live culture and it's unflavoured with no gelatin. Remember, starting with fresh ingredients of the best quality you can afford and find will give you the best yoghurt.
The cheapest way to make this up is to use powdered milk but you can also use milk from the supermarket, raw cow's milk or soy, goat or sheep milk. You could also use UHT milk and if you do, you don't have to almost boil the milk at the start - this milk is sterile. To make up the powdered milk you'll need just under one litre/quart water and the recommended amount of milk powder to make up whole milk, and about ¼ cup extra of powdered milk.
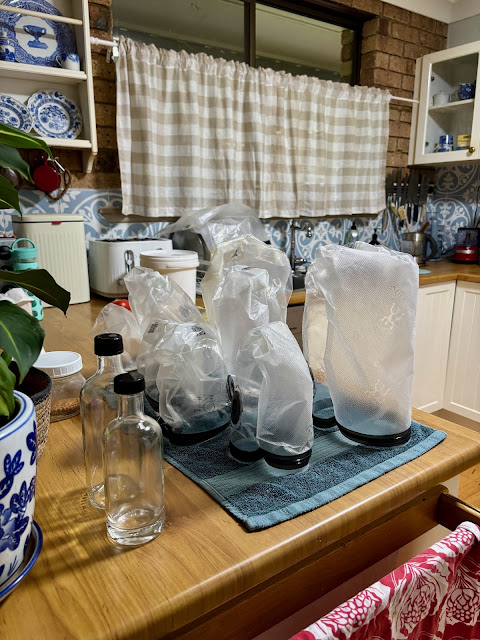
You'll need a 1 litre/quart mason jar or some other sealable container, a saucepan and a towel.
Make up the powdered milk in the saucepan, or if you're using fresh milk, add it to the saucepan over heat. Heat the milk until you see tiny bubbles start to form at the edges, then remove from the heat. This process will kill off any harmful bacteria that would spoil the yoghurt. Pour the milk into a pre-sterilised mason jar. You can sterilise the jar by pouring boiling water into it or putting it into a warm oven for 20 minutes. Be careful to keep everything clean as you don't want to contaminate the milk, utensils or jar once you've started .
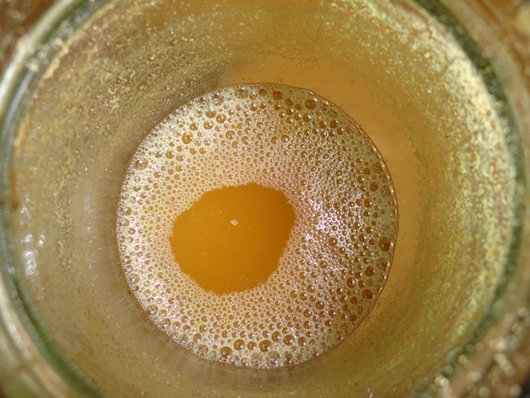
Let the milk cool but don't let it go cold. When the milk has reached the point where you can put your hands around the jar without it burning you, it's time to add your yoghurt. Add about a cup full of yoghurt and the extra ¼ cup of powdered milk - this will give you a thicker yoghurt. Then seal the jar and wrap it in a towel. Put it into a warm (not hot) oven, that is turned off, and leave it there, without opening the door for about 12 hours. When you open it again, you'll have yoghurt.
You can flavour the yoghurt with jam, honey and vanilla, maple syrup or stewed fruit. If you want to add fresh fruit, add it just before you eat it. I put my yoghurt into smaller jars for sweetening - one here is raw honey and vanilla, the other is homemade rosella jam. Store it in the fridge, it will keep for about three weeks. Tomorrow we'll go on to a couple of things you can make with the unflavoured yoghurt.
You can buy yoghurt starter in Australia here and here or in the US/Canada here and here, if you're in another country, Google "yoghurt/yogurt starter UK" or whatever your country is.


.jpeg)


.jpeg)
.jpeg)
.jpeg)
.jpeg)
31 Comments
I learned to make yogurt from you Rhonda, so my method is fairly similar! My first few attempts didn't thicken, so don't be disheartened!
ReplyDeleteI boil about 1-2 pints of milk, then let it cool til I can stick my finger in it. Then mix with a large dollop of yogurt and a spoon of dried milk powder, and then stick in a large old vacuum flask and put under a couple of blankets in the corner of the sofa - very technical!
I usually do that in the evening, and then pour it out in the morning and have it for breakfast.
No weighing, no measuring, and no timing - I'm a big fan of simple slapdash methods!
I'd recommend anyone has a go - or a few goes til you get it right!
Jenni
(and to answer yesterday's question, my phd is going to be printed and stuck on a dusty old shelf in the university library where it will probably remain untouched for the next 60 years. Might try to publish a few articles based on it though...)
:)
WOW - This sounds awesome!
ReplyDeleteHi Rhonda Jean, thank you for this information. I just made Quark (or lebnah - tomAto/tomato?) from your postings 2 days ago. I flavored it with chives and basil pesto I made from the garden. I enjoyed it a lot. Now, for the next step - make the yogurt instead of buying it. Thank you for all that you share. Emily
ReplyDeletel have made yoghurt in the past it is very simple and so yummy. l used raw cows milk, bring it to the boil, let it cool, add yoghurt then put into a large mouth vacuum flask. l didn't wrap mine up just put it on the warming plate holder of my combustion stove over night and we had yoghurt for breakfast. The kids loved it.
ReplyDeleteHi Rhonda
ReplyDeleteHave not posted a comment before but am an avid reader. Will have a go at the yoghurt but am curious to know if you have posted a recipie for sour cream. My thoughts are that you would need only to sour some fresh cream with lemon juice or vinegar but I might be completly wrong. Your thoughts or readers thoughts would be great.
Thanks
Suellen in NZ
Just a question: the next time, do you use some of the yogurt you made, or do you buy more to start the next lot?
ReplyDeleteI make mine in the Crock-Pot. Add the milk and about a 1/4 cup powdered milk. Turn it on high for about an hour or so until it bubbles along the sides. Turn it to warm for an hour, add the yogurt culture, stir to combine. Put a folded towel over the whole thing and in the morning there's yogurt! If I want it flavored, I usually add that when I add the culture and I just add a little bit more powdered milk to make up the difference. Took me a couple of tries, but now I could do it in my sleep!
ReplyDeleteI make our own yogurt too, and use the cooler method. Same as yours, except once it's done in the jars, I put it in a cooler with mason jars filled with very, very hot water packed around the yogurt jars, newspaper on top for extra insulation. I wanted a method that didn't use the oven or counter space (I have a small kitchen), and this one really works!
ReplyDeleteI do love to make yogurt. I heat mine with a microwave for about 3.5-4 minutes, don't boil. Let it sit til you can insert your pinkie for 10 seconds (we all have different "let it cool" temps..lol) I then add about 1/4 cup yogurt, either left over from the time before or store bought and about 2 Tablespoons of powdered milk, wrap in a tea towel and then wrap with a heating pad on low for about 12 hours/ over night....til thick. Enjoy with jam, fresh fruit or plain. Or save it for frozen yogurt. Just add fruit and sweetener and churn in your ice cream maker.
ReplyDeleteI made yogurt yesterday and had some issues. I posted them in the crockpot yogurt thread over in the homemade dairy section of the forum. I would love any input anyone has. Reading this now I did not cover my jars with a lid so maybe that was my issue. I did cover it with a coffee filter to keep things out of the jar.
ReplyDeleteYour yogurt looks so thick and delicious! I can't wait till I get all the kinks worked out and can make this myself. :)
Hi Rhonda
ReplyDeleteI would like to freeze some yoghurt to use in place of icecream for smoothies. Is there a special way of doing that, or do you just freeze, stir, freeze, stir etc like you do icecream??
I've made yogurt once before...but it wasn't as thick as your's. We thickened it bananas. I haven't done it in awhile, I might have too! Thanks for sharing!!!
ReplyDeleteI make mine in a crockpot, and you can find the recipe here:
ReplyDeletehttp://mamasfixins.blogspot.com/2009/04/vanilla-yogurt.html
I have found it very important to get the milk up to 170 degrees fahrenheit. I use 3 1/2 cups of 2% milk with about 3/4 cups powdered milk, heat to 170. Then let cool to lukewarm (about 100-120). Mix a little with 1/2 cup starter and add that to the milk. Then I have a thermal style lunchbag that is exactly the size to put 1 quart jar of very hot water, 1 quart jar of yogurt. There is a small amount that won't fit into the quart jar and I put that in a small jar (to keep for starting the next batch). All 3 jars then go into the lunchbag. I close it up and check in a couple of hours and refill the jar of hot water. My yogurt is usually set in 5 hours. It is not too tart, but thickened. I like my yogurt not too tart, so this method has worked well for me and it is always done. If you like it tarter, just keep it in the bag longer up to 12 hours, changing the hot water if possible.
ReplyDeleteI used to have problems sometimes getting my yogurt to set. Trial and error proved to me the importance of heating the milk properly, and having a better control of the warm air surrounding it. Sometimes my cold kitchen was just not warm enough in the winter to get it to set.
I have been making home made yogurt for years and I love the stuff! I prefer a Greek-style, thick yogurt and I use half & Half, and 3 TBS of yogurt for my "starter". Sometimes I forget and eat the last 3 TBS... in which case I have to buy a small thing of yogurt to start my next batch! I love it with flaxmeal stirred in, some fruit, and sugar-free coffee syrups to flavor it!
ReplyDeleteI use the same method of the towel and oven. I also make mine in the evening like another poster and remove it the next morning and refrigerate. Works out about right tie wise.
I make my own with an Easi Yo yoghurt maker. Sometimes I use the powdered starter that they make, sometimes I use natural yoghurt and skim milk. Makes about 1kg of yoghurt and we just add flavourings when we eat it. No boiling or cooking although I'd like to try that method sometime!
ReplyDeleteI was wondering what the difference would be if the store bought yoghurt has gelatine added. Because the yoghurt I made with using store bought yoghurt was a bit what you call slimmy.Could this be caused by gelatine or something else.
ReplyDeletethis really is an excellent blog. thank you so much for all the informative articles. i spent 3.5 yrs in queensland over at UQ and had a blast getting to know australia.
ReplyDeletecompared to malaysia where i'm from, the cost of living in australia is relatively lower (i'm speaking from a dollar to dollar perspective, not from a conversion standpoint). it's been a while now since i've been back but i remember arnott's cookies costing like AUD2.50 at Coles/Woolies... over here, they're about RM10.
my favourite categories in your blog are cutting back and budgeting. do keep up the good work. as a blogger myself, i enjoy writing as much as i enjoy reading other people's blogs. perhaps you could visit one day at http://howshouse.com - malaysia's interior design blog
I've got cheese being made in the fridge right now using your yoghurt and cheesecloth method. I'd love to make my own yoghurt too. The kids eat a ton of it, but I don't, so this experiment is only worthwhile if they like it.
ReplyDeleteWhat I'd really like is a cow so I could play with hard cheeses, butter, creams, sour cream...
I was talking to my brother about making yoghurt literally minutes before logging on here and reading this post!
ReplyDeleteHe used to use his esi-yo or similar commercial yoghurt maker. Make up milk using milk powder or just use normal milk. Fill up the container with the milk, add a big tablespoon of your last batch of yoghurt, put it into the insulated container with the boiling water surrounding it and in the morning it's all yummy yoghurt. He never used to cook the milk first.
It all sounds so simple that I think I'll never buy another yoghurt sachet again!
Hello Rhonda!
ReplyDeleteI've just finished catching up on your blog and thought I would say hello. I found you throught your SGF co-op and I have to say I love that and your blog. You and Hanno are an inspiration to me and I look forward to "sitting at your feet" and soaking up the wisdom.
That is so much simpler than some of the methods I've come across. Awesome!
ReplyDeleteI made yogurt all the time back in the 1970's...it was with a yogurt maker and I used non-fat milk. It turned out pretty good. Gosh, I wonder what ever happened to that yogurt maker? Hmmm, perhaps I'll see if I can find another one. Was very simple and very good. Mumzie :)
ReplyDeleteMmm. This looks wonderful. I've always been interested in making yogurt, and cheese as well. Thank you so much for the tutorial- you make it so easy to understand, and the process is nicely simple. Someday DH and I are hoping to have a small farm where we can have a milk cow and some chickens, but for now we are just growing food on our own little place. Thank you again for the post, it's so helpful!
ReplyDeleteJerusha
I have an easi-yo yogurt maker, which I find simple to use but using the sachets intended for it is now very expensive. What I now do, rather than buy a pot of yogurt, or a starter is to buy one sachet of the yogurt mix. I usually buy a UHT treated milk as I find it works better, to my litre of milk I add just a couple of teaspoons from the sachet of yogurt mix. I then use the easi-yo maker in the usual way. I seal the rest of the sachet and store it in the freezer. This means I don't have to go out to buy a pot of yogurt and UHT milk can be stored in the cupboard till needed.
ReplyDeleteI make yogurt in a crockpot using organic milk and a small container of organic yogurt (with no flavors or added sugars) as the starter.
ReplyDeletehttp://crockpot365.blogspot.com/2008/10/you-can-make-yogurt-in-your-crockpot.html
My latest batch of yoghurt didn't work right, so I had to throw it away - smelt and tasted like squashed ants - blechh. I'm interested to see that people add milk powder to their mix, I'll have to try that. I don't think I'm keeping the mix warm enough either, will have to try the esky technique!
ReplyDeleteAnna
I really need to make my own yoghurt. Seems like such an obvious idea. There is nothing like homemade! Fantastic directions and tips.
ReplyDeleteI`ve made yoghurt, using UHT dairy milk, for years. I`ve recently tried soya milk but without success. Do you have any tips? I make my yoghurt in a yoghurt-maker machine.
ReplyDeleteThank you for such an informative blog.
Angela, in Spain
Having decided we must wath our money even closer I am going through your posts :) I will have to try the yoghurt as my kids love it but its so expensive in the shops!
ReplyDeleteHello,
ReplyDeleteI've just found your post whilst looking for Yogurt making using UHT milk and skim milk powder. I"m very glad I did. You've turned me on to an idea I hadn't previously considered. Just using the powder. I'm living in the Canadian Arctic, working as a teacher and the price of milk is insane; $17.00 (cdn) for 2 litres of milk. I love my home made yogurt, hence looking for cheaper ways and using UHT milk. The recipe I'm using calls for; 2 litres of milk, 2/3 cup of milk powder, 2 packets of starter. Skim milk powder is expensive but still a much much better deal that even the UHT milk. I'll try as soon as this batch is eaten. Nice site, I had a look around, I'm going to book mark you.
Cheers,
Deirdre
I welcome readers' comments. However, this blog never publishes business links or advertisements. If you're operating a business and want to leave your link here, I will delete your comment .