down to earth

  • Home
  • About Us
  • Down To Earth Book
  • Privacy Policy

I've been kindly given the Daily Dose award by two of the lovely ladies who read here. Lib at Lib's Private Paradise and Tracy at Seaside Enchantement. Thanks gals! Both these ladies have great blogs so if you haven't visited them yet, do yourself a favour and click on the links.

This is from Xandra the creator of The Daily Dose Award.:
"This little award is called The Daily Dose - and here is all the important info to tell you what it is about and where it came from. This is a tribute to all the blogs that you've discovered that you can't possibly live without. They make you laugh, cry, think and feel connected every time you read a post. They give you a thrill as you see them loading into your browser and you get an equally satisfying thrill when you see that they have commented on your blog."

The swap partners list will be posted later this morning.
I caught up with my chores yesterday and had a free and easy day just going back and forth through the house tidying up as I went. I cherish the time I have to work at home, so as I do this and that I am thankful for the ability to work as I do.

It was a rainy day here yesterday so I hung washing under the cover of the back verandah. It took all day to dry, whereas if it's on the clothes line it's generally dry in a couple of hours. It's always a joy to see cotton sheets and aprons blowing gently in the breeze. I swept and washed the floors, baked bread, checked the vinegar, wrote some letters and sorted the vegetable seeds. It was a morning spent at a gentle pace with the sound of the rain falling on the roof. Bliss.

A few days ago I came across an old towel that was past its time, so after lunch I cut it up for rags. I keep moving my rag collection and it never seems to be in the right place so I decided to make a rag bag to hang in the laundry. I just made a large version of a peg bag with a flap at the front. The terry cloths are now hanging in the bag and I'm quite pleased with the result.

Late in the day Hanno went to pick up the mail and I was delighted to find a parcel from Dot waiting there. She sent me "Choosing Eden" to read and has kindly suggested I give the book away on my blog. So when I finish reading, I'll carry out Dot's wishes and give it to one of the regular readers here. Thank you for your generosity, Dot.

After a dinner of leftovers and fruit, I tidied up my sewing room, talked to Hanno for a while then retired to bed with Dot's book. Rain was still falling on the roof so another easygoing day at home ended perfectly - reading and falling quietly into sleep.
The tea cosy swap looks like being a lot of fun but I realised today I won't have the time to join in. : ( I'll be interested to see the photos as they come in.

Sharon and Loraine (chookasmum) will be organising the swap and assigning partners on Saturday. You can still join today and tomorrow.

I found a few more links to inspire some wonderful creations - here, here and here. Your tea cosy can be sewn, knitted, felted, patchwork, embroiderd, red work, crocheted, or whatever you want to make it. It needs to fit an average sized tea pot - 6/8 cups, or whatever you work out with your partner.

If you've never been in a swap before, take the plunge and have some fun. I'm sure you'll enjoy it.
One of the things that will make your work easier in the kitchen is to have a good set of knives. I use a variety of knives from good quality German chef's knives to cheap Chinese choppers. They are all used for their own purpose. Generally knives are expensive but they will last a long time if they're cared for properly.

Store your knives so the blade doesn't hit or rub against anything. I use a magnetic strip, but you could also use a knife block or a non-slip tray in a drawer that keeps knives apart.

All knives will eventually lose their edge and need to be sharpened. You can do that with a whetstone. While a whetstone will sharpen a knife, a steel will maintain the edge of your knife. Generally you'd sharpen a frequently used knife about once a month and use the steel when you use the knife. I'm a bit slack doing that. I do sharpen my knives each month but I usually forget to use the steel before I use the knife. There are instructions below for using a whetstone.

The heat and corrosive chemicals in the dishwasher will eventually damage the edge of most knives. You should hand wash your sharp knives. Wash in warm soapy water and dry thoroughly as soon as you wash the knife.

Don't let your knives soak in the sink or sit on a wet sink. Wash and dry them as soon as you can.

Don't use the knife edge to scrape food from your chopping board. It will damage and dull the edge. If you want to use the knife, turn it over and use the other side of the blade.

Use wood or poly cutting boards as marble, glass or ceramic boards will dull the knife edge.

If you have wooden handled knives, apply some oil to the handle every so often. Make sure you don't allow these knives to soak in the sink or remain wet for long periods.

When you buy your knives, try to get good quality for your main work. As you can see from my knife strip above, I have some good knives and some very cheap ones. I use the cheap ones for chopping vegetables as I find a chopper easier to use. I need to sharpen these choppers more frequently as they tend to lose their edge quickly but they're a good knife for general work. If you can't afford to buy better quality right now, try the Asian choppers and knives. You buy them in Asian grocery stores and supermarkets for around $5 - $10. On the other hand, a good quality German or Japanese knife will cost around the $100 mark.

Whatever knives you work with, you will ensure their life and their usability if you look after them and keep them sharp.

Knife skills video.
How to use a whetstone.

One of the many things you can do on your journey towards simplicity is to learn how to store things in a way that will stop them spoiling before you use them. It’s an important part of our philosophy to look after what we own.

When I lived in Europe I noticed it was commonplace for houses to have cellars. These were used to store potatoes, onions, garlic, jams, chutneys, sauces, beer, wine, seeds, flour and other perishables. If you have a cellar, make the most of it. It will provide an ideal place, with a consistent temperature, to store all manner of goods. In Australia, cellars are almost unknown and many houses do not have a large amount of cupboard space. The understanding being that goods will not be stored in the home, but bought continually from the shop.


Our home is a modest slab brick construction with an open plan kitchen and dining area. In the kitchen we have adequate cupboards and a pantry and just off the kitchen, in the dining area, we have a stockpile cupboard. There is a linen cupboard in the hallway and a freestanding cupboard in the main bathroom. Apart from wardrobes and dressers, they are my main storage areas inside the house. Outside we have a brick garden shed and a large storage shed and workshop.

If you don’t have a lot of storage space in your home you might have to look for unusual places to store goods. Under the bed is the obvious one and here is an article here about making an under bed storage unit. Look around your home and see if there are other places you could use - maybe under the stairs or under a table. I have a friend who made a fitted cover for her dining room table, which she rarely uses, and under it she stores toilet paper, tissues and rice.

While there are some exceptions like cheese and wine, most food will not improve in quality or flavour when stored for a period of time. You should store food when it still looks, feels and smells good. Most fresh food will be eaten straight away or stored in the fridge. If it's not eaten fresh the best form of storage over the long term are glass containers. Glass allows you to see what’s inside, it seals well, doesn’t taint the food and it’s a durable product, lasting many years. I have several sizes of glass containers with rubber seals. The seals have to be replaced every few years but overall they are a very reliable container.

Plastic containers are also often used for kitchen food storage. In my experience, plastic doesn’t seal as well as glass and you may sometimes get insect contamination using plastic. Plastic may also take on the smell of the food being stored, which may effect what you can store in it from then on. If you’re using plastic containers make sure you always seal them properly, ensuring a neat seal around the entire perimeter of the lid.
If you’re new to the home storage of food, work with the containers you have but as you buy more, try to get the large glass ones. You can also recycle old jars, I have several of these and they’re excellent, and you can buy glass jars from supermarkets, department stores and op shops.

Food in Australia must be marked with one of three date codes: “best before” date, “use by” date and “baked on” date.
Best before
When food is stamped with a best before date, it means that the food, if still in the intact package, is at its premium on or before the date marked. If the date has passed, the food may still be edible, but may not be at its best. Sometimes you will see best before food that has passed its date reduced for sale in the shop.
Use-by
This indicates the end of the acceptable storage life of the food. All food that should be eaten within a certain period of time for health and safety reasons, will be marked with a use-by date. It is illegal to sell food after the date marked as “use –by”.
Baked on
This is used on bread that has a shelf life of less than seven days.

When buying food that will be stored for a while, always make sure the can or package is not damaged. When adding new items to your stockpile, always add to the back and take from the front. You need to rotate your stock so nothing spoils.

I put all the dry food I buy, like rice, flour, pasta, lentils, dried chick peas and beans, in the freezer when they are brought from the store. All my dried goods are stored in the freezer until I need to use them, then they are placed in a glass jar and put in the pantry.

I learnt the hard way that food needs to be stored correctly. A pantry moth invasion made me give a lot of grains
and legumes to the chooks. Never again. All you need to do is to work out what you have to store over a long period and find the right storage method for it. We're all different and your solutions may be different to mine but if you ensure your food and dry goods survive for long periods, you'll save money and reduce the amount you waste.

UPDATE
I didn't have the time yesterday to take new photos so I've just done that now. The photo below
shows the large jars I use. The two on the left and right are canning jars with rubber ring seals that are replaced every year or so. The jar in the middle was given to me by my son. I have several of these and they were originally used to hold olives. They easily hold a kilo (2lb 2oz) of sugar, flour, beans etc.

The bucket below is similar to what Niki is talking about in the comments. This is a 5 kilo recycled plastic bucket I use to store my bread flour. You can buy these, but I got mine free from the local baker who buys icing in them. They have a good seal and are great for storing large amounts of dry food.

If you find some of these food quality plastic buckets that have been used to store food, wash them out with soapy water, fill with water and add two cups of white vinegar. Allow it to stand for a day, then wash out again and rinse. That should get rid of any residual smells in the plastic.

My life has been far from simple this past month as I've had so little time to relax and think about my world. Life continued at its fast pace when I started back at the Centre yesterday after a break of two weeks. Truth is I only had a few days off as I was up there cleaning and organising while the place was closed. I'm now going to work three days a week as we don't have enough volunteers to cover the days we are open. I'm interviewing a potential volunteer this morning so hopefully she'll be suitable and will want to join our small and friendly group. I am trying to keep the blog going but I might have to post at a different time. I'll see how I go.

So who would like to do another swap? I thought it would be a good idea if we did something that would suit knitters, sewers, felters and crocheters. Enter .... the tea cosy. Your cosy should be for an average size tea pot - 4 - 6 cups, unless you make arrangements with your swap partner to make a smaller or larger one.

We will gather names until Friday, and post the list of swap partners on Saturday. The deadline for the swap is Friday February 8. Please make sure you’re free to work on your tea cosy before you commit because late parcels will hold up the next swap. Everyone is welcome to join in as long as you can post on or before February 8.

This is important: To join in just add your name and email to the comments box. Please type your email address in this format: rhondahetzel at gmail dot com. That will give your swap partner the ability to email you for your postal address and will make the swap MUCH easier for us to organise. If you do not wish to include your email address in the comments box, please email it to me.

This is our
fourth swap and they're always a lot of fun. If you've not been involved before now, it is a good way to develop your skills and get to know your swap partner. : - )

Some
links to give you ideas:
Felted tea cosy.
Fabric tea cosy pattern and instructions here and here
Knitted tea cosy here and here.
Crocheted tea cosy here.
Vintage knitted tea cosy here.

This is part of last year's rosella harvest.

Bush tucker is the aboriginal term for edible plants and animals. There are a few bush tucker foods in our area, we have lilly pilly, macadamia nuts, lemon myrtle and rosellas (Hibiscus heterophyllus). I'm sure there are more but I've never had the time to identify what grows near us.

This photo, taken this morning, shows an opening rosella flower with a couple of small red rosellas growing near it. These rosellas are only about a quarter of the size they will eventually grow.

Rosellas thrive here and we grow them every year for jam. I believe you can also eat the leaves as a kind of spinach but I've never tried it. This year we have planted a lot of rosella bushes as I want to make jam, tea and cordial using the rosella flowers. Hanno has had high blood pressure for many years and recent research at the Universiry of Queensland indicates rosellas may help reduce hypertension. My plan is to produce enough rosellas for the entire year so that Hanno may have rosella tea, cordial or jam every day.


Rosella jam boiling on the stove.


We've just had two weeks of rain and the half grown bushes were knocked around quite severely with the rain and wind. Side branches snapped off, as the bushes aren't very strong, and several of them have wilted. I hope we can save them.

I took this photo this morning. These bushes are still only small but are already producing edible fruit.

Rosellas grow in hot weather, so we plant our seeds in late September and plant the seedlings out in November. They like full sun and a fair bit of water. The fruits form after the pretty flowers fade. We grow the pink flower variety but there is also a yellow form.

If you live in a hot area, you should try growing rosellas. The jams and teas made from this bush are delicious. Do you eat any of your native foods? I'd love to know who is eating what and how easy your native foods are to find.

Recipes for rosella jam, cordial and tea. Rosella jam.

Sometimes I think people are scared to live simple lives. They look and see a life lived with none of the props of modern living like recreational shopping, one upmanship of the Joneses, no designer labels, new appliances, or dining out, going to the library instead of buying books, no pay TV, gossip magazines or convenience foods. The starkness of that scares them. They say they don't want to live like that but the reality is they don't want to give up the props, they fear they'd fall over.

As well as creating insatiable desire in us, magazines and TV are great time wasters. If you give them up you'll have much more time to devote to really living your own life. Instead of watching others live their lives, you can concentrate on yours. I guess blogs fall into this category too. If you're reading a lot of blogs trying to get motivation, but instead find you're wasting a lot of time, then you should limit yourself.

The truth of simple living is that you learn to be independent. It's the kind of mindset that sees strength, reliability and dedication to a purpose as an important part of life, and the props of modern living as an irrelevance that gets in the way. When you reach that stage you're truly independent. You live without constraint, you don't have to be any one thing, you don't have to dress according to fashion; you do what you do because you see a reason for it, not because everyone else is doing it. You are a non-conformist.

I look like the average Autralian woman of my age but my exterior deceives. I am not like my contempories at all. I do not believe the lie that buying more of what I want will make me happy. I believe I will find my happiness in the true and good things that I create for myself. I believe my happiness is in my family and friends, having a genuine purpose to my day, in being creative and productive. I wonder why my contempories want to retire and do nothing. I want to work - I know that work is good for me, but I want my work to be fulfilling, innovative and productive. I want my work to give me what I need to live, not the money to always buy what someone else produces for me.

Over the past few days I've written about green cleaning. I hope those posts show that you don't have to go to a supermarket to buy the latest detergent or the super duper toilet cleaner. You can cross those things off your list forever. You can buy generic products and make your own cleansers that work well, don't cost a lot and will move you further away from the consumer nightmare of modern life. Green cleaning is a good entry point to simple living. We all have to clean our homes, but this is a point where we can step up and make a stand. When you are happy that you can still keep a clean house, you can move on to other things - like stockpiling, buying generic brands, cooking from scratch and all the other activites that will spring from them.

Slowly you will start to live more simply. Inch by inch you'll see that rejecting modern views of life work well and that providing for yourself builds satisfaction and confidence. It seems to me that satisfaction and confidence are in short supply these days. Luckily we can all grow our own at home.
I found this webpage today. It the bloggies! It's calling for you to vote for your favourite blogs. There are categories for all over the world as well as various categories. Voting closes next week.

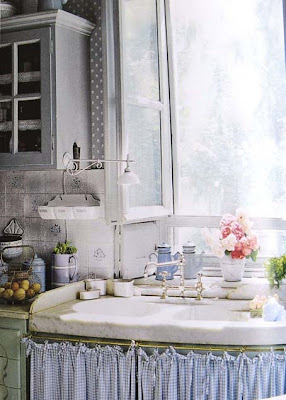
All things return to the kitchen. ; - ) Put your apron on and let's tackle it. It will probably take a few hours to deep clean a kitchen, so put aside a morning or an afternoon to get it done.

The night before you do your kitchen, you can start cleaning your oven using the following:

Oven Cleaner
¼ cup ammonia
2 cups of warm water

Be careful of the ammonia fumes. Turn on the oven and leave to heat up for 10 minutes, then turn it off. Pour ammonia and warm water in a baking dish and leave in the warmed oven overnight.

The emphasis in the kitchen is being clean without being obsessed with it. As well as the build up of dust and dirt, there is usually the grease issue in our kitchens, so that adds another element to our cleaning.

I think the best way to deal with a kitchen is to work on getting it clean, then do a little maintenance each day to keep it clean. Even so, you'll need to do a deep clean and reorganise every six months or so.

The first thing to do is sweep the floor. Scoop up the dust and crumbs and dispose of it in the compost or bin. Then get out your kitchen cleaning kit.

If you've never given your kitchen much thought, now is the time. If you love cooking, a well organised kitchen will make it a pleasure to work in; if you don't like cooking, a well organised kitchen will make it easier for you.

Go into your kitchen and look at your work areas. Do you do a lot of baking/canning/preserving? Where are you baking/preserving ingredients and materials? Are they near where you work? Where do you keep your glasses, are they close to the tap? Are the tea cups and coffee mugs close to where you make tea and coffee? Is it easy to unpack your dishwasher or put away clean plates and cutlery? I'm sure you get the general idea - move things close to where they are used. Change your kitchen to suit how you work.

As you move things around, wipe the shelves and drawers with a terry cloth, hot water and soap. Wipe dry with your dry cloth.

When everything is in the place it will stay, fill the sink with hot water and clean the oven. Remove the racks and wash them in the sink with all purpose cleaner #2 or soap and water. The ammonia in the oven overnight should have loosened the grime, which you can then clean with all purpose cleaner #2 or soap and water and a stiff brush. You can also scour baked on areas with a paste of bicarb soda and water. When you're happy with the result, replace the racks, wipe the oven with a clean moist terry cloth and wipe dry.

Now check your fridge. If it needs cleaning, empty it completely, wipe the shelves, and replace the food and drinks. Any food past its prime should be given to the chooks, worms or compost. Don't forget the seals on the door. You can clean them with a toothbrush dipped in all purpose cleaner #2. Use a new toothbrush and keep it in your kit for future cleaning. Check that the seal is actually sealing too. Put a piece of paper over the seal and close the fridge door. Try to pull the paper out. If it comes out easily, you need to replace the seal. Clean the outer fridge with creamy soft scrubber and wipe dry with a clean cloth.

All-Purpose Cleaner #2
  • ¼ cup baking soda (bicarb)
  • 1 cup ammonia
  • 2 litres warm water


Mix all the ingredients together and store in a sealed plastic container that is marked with the name. Dry with a clean dry cotton cloth.
This cleaner can also be used as a floor cleaner – tiles, laminate or vinyl or for general cleaning of walls, counter tops or sinks.


Creamy soft scrubber

  • Simply pour about ½ cup of baking soda into a bowl, and add enough liquid soap to make a texture like very thick cream.

This is the perfect recipe for cleaning appliances and cupboard surfaces because it rinses easily and doesn’t leave grit. It is also good for the bath and shower. Note: To keep it moist, add 1 teaspoon of glycerin to the mixture and store in a sealed glass jar. Otherwise just make as much as you need at a time.

If you have time, you could also clean out your pantry. If you don't have the time, leave that task for another day.

So, the oven and fridge are clean and the cupboards and drawers are organised the way you want them; now clean the stove. Remove the bits you can, including the knobs, and wash them in hot soapy water in the sink. Depending on what type of stove you have, use either the creamy soft scrubber or the all purpose cleaner #2 to clean the surfaces. I used to use the creamy scrubber on my old enamel stove, now I have a stainless steel stove, I use the all purpose cleaner #2, dry with a terry cloth, then wipe over with a clean moist cloth with a bit of eucalyptus oil. The eucalyptus oil removes the streaks. If you have stainless steel appliances, you could also use this on them. When the stove is clean, replace the parts you cleaned in the sink.

Now empty your benches. Thoroughly wipe everything with All Purpose Cleaner #2 or creamy soft scrubber, wipe the benches, cupboard doors and handles and the splash-back or tiles area behind your benches and sink. Wipe dry with a terry cloth and replace everything.

Now that most things have been cleaned, you can clean the sink.

Sink Cleaner

To clean a dirty sink, or to make one shine, wet the sink, combine equal parts of bicarb soda and course salt and sprinkle it on. Scrub the sink with a hard brush to remove dirt and grease. Make sure you get in all the areas around the taps and drain. About once a month, finish off with a litre of water in the sink, add a tablespoon of liquid bleach and remove the plug. You’ll sanitise and clean the pipes at the same time. Wipe with a dry terry cloth.

You're almost finished. The only thing left is the floor. Depending on the type of floor you have, use the following:

Floor cleaner – floating wood, tiles, vinyl or laminate

  • ½ cup white vinegar plus 4 litres hot water in a bucket and a clean mop will clean up all but the worst floor.
  • If you have a really dirty floor to deal with, add ¼ cup grated homemade soap to this mix.


Wooden floor cleaner

  • 2 tablespoons homemade vegetable soap - grated
  • ½ cup vinegar
  • 500 mls strong black tea (about a pint)
  • bucket warm water

Combine all the ingredients in a bucket. A clean mop is necessity when cleaning floors. If you start with a dirty mop you’ll just loosen the dirt on the mop by making it wet again and then spread that on the floor. When you finished your cleaning jobs, rinse the mop out to get rid of the loose dirt then let it soak in the bucket half filled with water and a ¼ cup of bleach. Let the mop soak for 30 minutes, rinse the bleach out and dry the mop in the sun.

Simple green cleaning requires more effort than spray and wipe chemical cleaning, but your home will be safer and CLEANER using these methods. When you have every thing clean, keep it that way by doing a little touch up each day. It only takes 10 minutes or so to wipe down the fridge or clean up spills on the stove, but it will make a big difference to your overall work load because you won't have to do a big clean like this every couple of months. Just a bit each day will keep you on top of your work.

If you've followed all the cleaning days you deserve a day off, so make plans to spend all tomorrow with your family or friends doing what you enjoy.

Thank you for stopping by today. : - )

ADDITION: I had an email from Killi today warning of the danger of using bleach of you have a septic tank. I agree that you should never use bleach in your house if you have a septic system. The ble

ach will kill the bacteria in the tank.

You have probably spent a lot of money on the floors and furniture in your home so it makes sense toprotect your investment by caring for them properly. You could easily go to the store and buy specialist cleaners for wood, leather, glass, fabric and carpet but if you want to be sure you don't add harmful chemicals to your own environment, use cleaners that you know are safe.

Buying a carpet cleaner or general spray that contains ingredients you don't know and can't even pronounce, could introduce harmful chemicals to your home. You and your family will sit on the furniture you clean, your children will play on the floor, so they must be safe. It is your responsibility as the homemaker to provide a safe and clean environment for the entire family. If you do this the green way, not only are you providing that safety, you'll also save money by using simple cleaners.

Our theoretical room today is the lounge room, or family room. First check the room and remove everything that shouldn't be there - like toys, clothes, cups etc. I'm guessing you don't live solo in your home, so make sure the children help you with this. It's an easy thing, even for a small child, to carry toys back to their own room. They can also carry clothes to the laundry and whatever needs to go to the kitchen. If you need heavy things moved - for instance, if you're going to vacuum behind the sofa, ask your husband or older children to help you.

When the room is clear of extras, you can start cleaning. Make sure you have your general cleaning kit with you so you don't keep running back to get cloths. When you decide which of the cleaners below work well in your home, add them, in a clearly marked bottle, to your general cleaning kit for future use.

There is a general debate over whether it's prudent to vacuum or sweep before you dust, or after. I vacuum/sweep first, because I believe that sweeping and vacuuming can create its own dust. So if you have a carpeted floor, vacuum it, making sure you use the crevice tool to get right into the join between the wall and carpet. While you have that tool on the vac, check for cobwebs and quickly suck them up if you find some. Also with the crevice tool, go along the windows and remove all the dust on the window sill and the recess the window fits into.

If you have wooden floors, you'll need to vacuum/sweep before you mop, but the mopping is the last thing you'll do. So for now, just vacuum or sweep, then go on to your furniture.

If the furniture is dusty, wipe the dust off with a slightly moist terry or cotton cloth. Then clean it with one of the two cleaners below:

All-Purpose Cleaner #1
½ teaspoon washing soda
2 teaspoons borax
½ teaspoon grated soap or homemade laundry detergent
2 cups hot water
Combine the washing soda, borax, and soap in a spray bottle. Pour in hot water, screw on the spray bottle top and shake until the minerals are completely dissolved. This cleaner can be stored in this spray bottle indefinitely, so mark it “HOMEMADE ALL PURPOSE CLEANER” with a permanent marker.

Spray the cleaner on surfaces you wish to clean. Use your terry cloth to rub on as you go. For hard to move dirt, leave the cleanser on for a few minutes before wiping it off. Shake the bottle each time before you use it. Dry with a clean dry cotton cloth.

All-Purpose Cleaner #2
¼ cup baking soda (bicarb)
1 cup ammonia
2 litres warm water
Mix all the ingredients together and store in a sealed plastic container that is marked with the name. Dry with a clean dry cotton cloth.

This cleaner can also be used as a floor cleaner – tiles, laminate or vinyl or for general cleaning of walls, counter tops or sinks.

Wooden furniture polish
½ teaspoon oil, such as olive oil
¼ cup vinegar or fresh lemon juice
Mix the ingredients in a glass jar. Dab a soft rag into the solution and wipe onto wooden surfaces. Polish with a dry cotton cloth. Seal in the glass jar and store indefinitely.

TV and appliances
Wipe the TV screen, as well as the glass on any picture frames you have, with plain vinegar on a clean cloth . Wipe the other appliances such as DVD player, stereo, remote controls etc with a barely moist cloth. Dry everything with a clean dry cotton cloth.

When all your furniture is clean, fluff up your cushions, take rugs or blankets outside and shake them, before folding and placing on the sofa again. Stack magazines, books and newspapers neatly.

If you've already vacuumed your carpeted floor, you've finished.

If you have floors that are not carpeted, now is the time to mop the floors. Choose the cleaners below suitable for the type of floor you have. Make sure your mop isn't too wet as you don't want the moisture to seep into the floor at any of the joins.
Please note: If you have wooden floors, you don't have to wash them every time you sweep or vacuum, just wash when you see the floor is dirty.

Floor cleaner – floating wood, tiles, vinyl or laminate
½ cup white vinegar plus 4 litres hot water in a bucket and a clean mop will clean up all but the worst floor. If you have a really dirty floor to deal with, add ¼ cup grated homemade soap to this mix.

Wooden floor cleaner
2 tablespoons homemade vegetable soap - grated
½ cup vinegar
500 mls strong black tea (about a pint)
bucket warm water
Combine all the ingredients in a bucket.

A clean mop is a necessity when cleaning floors. If you start with a dirty mop you’ll just loosen the dirt on the mop by making it wet again and then spread that on the floor. When you finished your cleaning jobs, rinse the mop out to get rid of the loose dirt then let it soak in the bucket half filled with water and a ¼ cup of bleach. Let the mop soak for 30 minutes, rinse the bleach out and dry the mop in the sun.

Tell everyone in the house not to step on the floor until it's completely dry.

Now that is done, it's time for a cuppa. : )


Today we're cleaning the bathroom using green cleaners, plus a little bit of bleach if you have a mould problem. Before we proceed though I want you to understand that every single compound you use - including green ones - can cause environmental damage if used in high concentrations. When you start green cleaning don't expect vinegar and bicarb to be as fast and effective as your commercial cleaners. They are gentle cleaners, and they're much safer in our waterways than any spray and wipe concoction you can buy. They are also much cheaper. But even so, they need to be used sparingly.

NEVER EVER mix ammonia and bleach together. It creates a dangerous gas.
Never mix ammonia with vinegar - they neutralise each other.

In my cleaning kit today I have one small bucket (2-4 litres), bicarb in a large salt or flour shaker, cheap white vinegar, ¼ cup grated home made soap - you could also use pure laundry soap, a bar of soap, at least four terry or cotton cloths, a bristle brush, a broom and dustpan, mop and bucket. Essential oil for fragrance is optional. If there are areas of mould, you'll also need a spray bottle containing a cup of water and a tablespoon of liquid bleach.

If possible, open doors and windows to allow a free flow of air through the room. Put on your apron and gloves.

Assemble your cleaning kit, go to the bathroom and check your shower grout. If it's got any mould growing on it, spray it with the diluted bleach mix and then go on to your sweeping.

Sweep the floor. Scoop up your sweepings in the dustpan and dispose of in the compost heap or bin. You will mop your floor later but you need to have all the stands of hair, dust, talcum powder etc. off the floor first.

Remove all the items you have stored in the shower, around your bathroom sink and bath.

Remove all towels and floor mats. Put them in the laundry for washing.

Check the mould on the grout. If it needs another spray, spray again and leave it. Please note: if you've allowed mould to grow on the grout for a while, the mould might have eaten right into the grout. You'll only be able to remove it if it sitting on the surface. There is little you can do for deeply embedded mould. You generally have to remove the grout and re-grout the tiles.

Pour a cup of bicarb into the toilet and add a cup of white vinegar and let it sit. It will fizz, that's okay.

Wipe the mirror over with a clean cloth with a splash of white vinegar.

Then go to your shower. If it's dirty, you'll need your bar of soap and brush. Pour about 1 litre (quart) of hot water in your small bucket, rub soap and sprinkle bicarb on the brush and scrub the dirty areas. Keep the brush wet with the hot water and apply the soap and bicarb when needed. Make sure you scrub around the taps, pipes and shower head. If the shower is not really dirty, just sprinkle bicarb onto your damp (not wet) terry cloth and wipe all the non-glass surfaces. When you're satisfied it's clean, add about 1 litre (quart) cold water to your bucket, and with a clean wet cloth, wipe all traces of soap and bicarb off all surfaces. To clean the glass, get the vinegar cloth you cleaned the mirror with, and add a little more vinegar. Wipe the glass shower screen with the vinegar cloth, making sure you remove all the soap scum. If you have a soap scum buildup, you may have to use your brush and some bicarb to remove it, wipe down with a wet cloth, then wipe with your vinegar cloth. When you've finished cleaning, wipe all surfaces with a dry terry cloth. Pay particular attention to the glass and stainless steel surfaces as they will show water spots if you allow the water to dry on them.

You've now cleaned your shower. You could also clean the floor of the shower at this time if you wanted to but I always leave that until I clean all the floors right at the end.

You have now used three of your cloths - one for soap and bicarb, one for vinegar and one as a dry wiper. Keep these cloths as they are, you'll use them again soon. Depending on the state and size of your bathroom, you might need more dry wipers.

Now go to your bath. We have a spa bath which we never use now. If you don't use your bath it probably won't need cleaning. I tend to wipe our bath over about once a month. If you do use your bath, repeat the same treatments as your used in the shower - if it's dirty use a brush, hot water, soap and bicarb; if it's not especially dirty, use bicarb on a damp cloth. Don't wipe this with vinegar, but wipe off all traces of bicarb and soap with a wet cloth and use your dry cloth to dry off the taps and the top of the bath.

Remember, bacteria generally needs moisture to grow. It's a good habit to get into with all your cleaning to dry off all your surfaces and not leave moisture around.

Go to the bathroom sink and repeat the cleaning as stated above. Use either the dirty or the not so dirty method. Make sure you clean the taps, around the taps and the areas where the taps join into the sink - this is where bacteria can build up so make sure you scrub those areas well with your brush. When it's all clean, wipe over with your dry wiper.

Check the toilet. You've already poured in the vinegar and bicarb, now it will need to be scrubbed with the toilet brush. Make sure you get into every area. If there are stains in the toilet, you might have to repeat this treatment - scrub it and leave it for a couple of hours. Then come back and scrub it with the toilet brush and flush the toilet.

If you used bleach for your grout and have some left over, pour it down the sink.

Take off your gloves, wash and dry your hands.

Now you can put your toiletries back on the bathroom sink. Put out fresh towels.

Your last task is to clean the floor and the floor of the shower recess. Half fill a normal size bucket (10 litres/quarts) with hot water and add the ¼ cup of soap. With a clean broom, yes broom, swish the soap around so it dissolves, drain the broom a little and then start scrubbing the floor. Clean the floor of the shower with this method too. Make sure you get into the corners. If you have tiled floors, make sure you get into the grooves of the grout too. When you're satisfied that the floor is clean, empty your bucket and fill with clean cold water. Wipe the floor over with a mop and the clean water. Make sure you remove all the soap and lather and right at the end, wring the mop out well so that you leave the floor moist, not wet.

When the floor is completely dry, lay down your fresh floor mats.

Now clean up your bathroom kit so it's ready for the next job. You want everything to dry out between uses. If they don't, they will smell and bacteria will build up in your equipment. Rinse the mop and broom off in clean cold water and wring out as much as possible. Stand them either in the sun or somewhere where they can dry completely. Put all your cleaning cloths in to be washed with your laundry. Wipe out your bucket and put in your cleaning kit of bicarb, vinegar, soap, fresh cloths etc and return it to the bathroom, under the sink, if possible.

This routine should take about 15 minutes for the average bathroom. If it's dirtier, add another 15 minutes.

Recycle old towels, cotton tshirts, sheets etc, by cutting them into squares and using them as cleaning cloths. You should never buy Chux or other cleaning cloths. I do like the Enjo products but I think they're too expensive.

This is the way I clean my bathroom. I do it once a week and wipe the vanity and taps over during the week when ever I feel like doing it. Sometimes that's once a day, sometimes it's only once a week. I don't stress over it, I just do it as it suits my mood. I expect you to use this as a guide, I EXPECT you to modify it to suit your ways of cleaning and your bathroom. It's like a recipe, it's just a guide, you change it to suit your circumstances. I hope you see that the emphasis is on elbow grease rather than chemicals. The products recommended here will thoroughly clean your bathroom, if you start out with a dirty bathroom, they might need two or three applications, but they will work. When you get your bathroom clean, you can keep it clean by using these methods once a week.

Whatever you do, make sure you use less and not more of everything - soap, vinegar, water, bleach etc. We are conservers, not consumers, and we try to keep everything to a minimum.

ADDITION: I had an email from Killi today warning of the danger of using bleach of you have a septic tank. I agree that you should never use bleach in your house if you have a septic system. The bleach will kill the bacteria in the tank.
Newer Posts Older Posts Home

MY BOOKS

MY BOOKS


My books were all published by Pengiun, and are available at Amazon US, Amazon UK and Amazon Au

Search here

Total Pageviews

Translate


I'm Rhonda Hetzel and I've been writing my Down to Earth blog since 2007. Although I write the occasional philosophical post, my main topics include home cooking, happiness and gardening as well as budgeting, baking, ageing, generosity, mending and handmade crafts. I hope you enjoy your time here.

MY FAVOURITE PLACES

  • Grandma Donna's Place
  • Grandma Donna's YouTube
  • Grandma Donna's Instagram
  • This Simple Day
  • Nicole's Instagram

Give More

Give More

All previous blog posts

  • 2026 4
    • February 4
      • First workshops, book by Friday
      • Workshops starting 1 March
      • Planting vegetable seeds and new workshops
      • Back where we belong
  • 2025 7
    • July 1
    • June 2
    • May 1
    • April 2
    • February 1
  • 2024 25
    • December 2
    • November 1
    • October 2
    • September 3
    • August 1
    • July 3
    • June 1
    • May 3
    • April 2
    • March 3
    • February 2
    • January 2
  • 2023 13
    • December 1
    • November 2
    • October 1
    • September 3
    • August 2
    • February 2
    • January 2
  • 2022 17
    • November 3
    • October 4
    • September 3
    • August 2
    • July 3
    • June 2
  • 2021 50
    • December 1
    • November 6
    • October 7
    • September 5
    • August 4
    • July 5
    • June 2
    • May 2
    • April 6
    • March 4
    • February 4
    • January 4
  • 2020 68
    • December 3
    • November 5
    • October 4
    • September 4
    • August 4
    • July 4
    • June 4
    • May 8
    • April 7
    • March 8
    • February 8
    • January 9
  • 2019 66
    • December 2
    • November 4
    • October 5
    • August 3
    • July 4
    • June 6
    • May 8
    • April 8
    • March 8
    • February 11
    • January 7
  • 2018 82
    • December 1
    • September 2
    • August 10
    • July 4
    • June 11
    • May 9
    • April 12
    • March 10
    • February 10
    • January 13
  • 2017 129
    • December 7
    • November 10
    • October 6
    • September 13
    • August 11
    • July 13
    • June 12
    • May 9
    • April 9
    • March 14
    • February 11
    • January 14
  • 2016 125
    • December 7
    • November 13
    • October 10
    • September 11
    • August 11
    • July 8
    • June 9
    • May 9
    • April 12
    • March 10
    • February 13
    • January 12
  • 2015 184
    • December 7
    • November 15
    • October 20
    • September 18
    • August 19
    • July 18
    • June 12
    • May 15
    • April 12
    • March 21
    • February 13
    • January 14
  • 2014 203
    • December 11
    • November 8
    • October 17
    • September 20
    • August 17
    • July 19
    • June 17
    • May 17
    • April 23
    • March 15
    • February 18
    • January 21
  • 2013 225
    • December 13
    • November 17
    • October 17
    • September 17
    • August 21
    • July 24
    • June 20
    • May 19
    • April 17
    • March 22
    • February 17
    • January 21
  • 2012 245
    • December 17
    • November 20
    • October 20
    • September 18
    • August 15
    • July 24
    • June 21
    • May 26
    • April 23
    • March 23
    • February 19
    • January 19
  • 2011 257
    • December 18
    • November 24
    • October 27
    • September 23
    • August 24
    • July 21
    • June 24
    • May 24
    • April 16
    • March 22
    • February 14
    • January 20
  • 2010 283
    • December 20
    • November 18
    • October 18
    • September 19
    • August 25
    • July 24
    • June 25
    • May 26
    • April 25
    • March 22
    • February 29
    • January 32
  • 2009 293
    • December 29
    • November 18
    • October 23
    • September 25
    • August 22
    • July 28
    • June 22
    • May 21
    • April 27
    • March 26
    • February 24
    • January 28
  • 2008 387
    • December 24
    • November 23
    • October 25
    • September 26
    • August 27
    • July 27
    • June 37
    • May 34
    • April 44
    • March 53
    • February 32
    • January 35
  • 2007 372
    • December 37
    • November 40
    • October 55
    • September 51
    • August 49
    • July 63
    • June 49
    • May 28


Trending Articles

NOT the last post

This will be my last post here.  I've been writing my blog for 18 years and now is the time to step back. I’ve stopped writing the blog and come back a couple of times because so many people wanted it, but that won’t happen again, I won’t be back.  I’ll continue on instagram to remain connected but I don’t know how frequent that will be. I know some of you will be interested to know the blog's statistics. 
Image

Every morning at home

Every morning when I walk into my kitchen it looks tidy and ready for a day's work. Not so on this morning (above), I saw this when I walked in. Late the previous afternoon when I was looking for something, I came across my rolled up Zwilling vacuum bags and decided they had to be washed and dried. So I did that and although I usually put them outside on the verandah to dry it was dark by then. I turned the just-washed bags inside out and left them like this on a towel. It worked well and now the bags are ready to use when I bring home root vegetables, cabbages or whatever I buy that I want to last four or five weeks.
Image

You’ll save money by going back to basics

When I was doing the workshops and solo sessions, I had a couple of people whose main focus was on creating the fastest way to set up a simple life. You can't create a simple life fast, it's the opposite of that It's not one single thing either - it's a number of smaller, simpler activities that combine to create a life that reflects your values; and that takes a long to come together. When I first started living simply I took an entire year to work out our food - buying it, storing it, cooking it, preserving, baking, freezing, and growing it in the backyard. This is change that will transform how you live and it can't be rushed.  
Image

Creating a home you'll love forever

Living simply is the answer to just about everything. It reduces the cost of living; it keeps you focused on being careful with resources such as water and electricity; it reminds you to not waste food; it encourages you to store food so you don't waste it and doing all those things brings routine and rhythm to your daily life. Consciously connecting every day with the activities and tasks that create simple life reminds you to look for the meaning and beauty that normal daily life holds.  It's all there in your home if you look for it. Seemingly mundane tasks like cleaning and cooking help you with that connection for without those tasks, the home you want to live in won't exist in the way you want it to.  Creating a home you love will make you happy and satisfied.
Image

Time changes everything

I've been spending time in the backyard lately creating a contained herb and vegetable garden. My aim is to develop a comfortable place to spend time, relax, increase biodiversity and encourage more animals, birds and insects to live here or visit. Of course I'd prefer my old garden which was put together by Hanno with ease and German precision. Together, we created a space bursting at the seams with herbs, vegetables and fruity goodness ready to eat and share throughout the year. But time changes everything. What I'm planning on doing now, is a brilliant opportunity for an almost 80 year old with balance issues. In my new garden I'll be able to do a wide range of challenging or easy work, depending on how I feel each day. It’s a daily opportunity to push myself or sit back, watch what's happening around me and be captivated by memories or the scope of what's yet to come.
Image

It's the old ways I love the most

I'm a practical woman who lives in a 1980’s brick slab house. There are verandahs front and back so I have places to sit outside when it's hot or cold. Those verandahs tend to make the house darker than it would be but they're been a great investment over time because they made the house more liveable. My home is not a romantic cottage, nor a minimalist modern home, it's a 1980’s brick slab house. And yet when people visit me here they tell me how warm and cosy my home is and that they feel comforted by being here. I've thought about that over the years and I'm convinced now that the style of a home isn't what appeals to people. What they love is the feeling within that home and whether it's nurturing the people who live there.
Image

Back where we belong

Surprise! I'm back ... for good this time. Instagram became an impossible place for me. They kept sending me messages asking if I'd make my page available for advertisers! Of course, I said no but that didn't stop them. It's such a change from what Instagram started as. But enough of that, the important part of this post is to explain why I returned here instead of taking my writing offline for good. For a few years Grandma Donna and I have talked online face-to-face and it's been such a pleasure for me to get to know her. We have a lot in common. We both feel a responsibility to share what we know with others. With the cost of living crisis, learning how to cook from scratch, appreciate the work we do in our homes, shop to a budget and pay off debt will help people grow stronger. The best place to do that is our blogs because we have no advertising police harassing us, the space is unlimited, we can put up tons of photos when we want to and, well, it just feels li...
Image

Making ginger beer from scratch

We had a nice supply of ginger beer going over Christmas. It's a delicious soft drink for young and old, although there is an alcoholic version that can be made with a slight variation on the recipe. Ginger beer is a naturally fermented drink that is easy to make - with ginger beer you make a starter called a ginger beer plant and after it has fermented, you add that to sweet water and lemon juice. Like sourdough, it must ferment to give it that sharp fizz. To make a ginger beer plant you'll need ginger - either the powdered dry variety or fresh ginger, sugar, rainwater or tap water that has stood for 24 hours to allow the chlorine to evaporate off. You'll also need clean plastic bottles that have been scrubbed with soap, hot water and a bottle brush and then rinsed with hot water. I never sterilise my bottles and I haven't had any problems. If you intend to keep the ginger beer for a long time, I'd suggest you sterilise your bottles. MAKING THE STARTER In a...
Image