29 November 2009

Quiches, cordial and choc chip cookies

We had a lovely weekend. I woke early on Saturday to bake pastry cases that I'd already prepared and had waiting in the fridge. It was our fundraising morning for the Centre and I was on a promise for more mini quiches. The ingredients cost $17 and we turned that into $72. Now that's value adding! So I crept around mixing eggs, cooking bacon, onion and garlic - there were two sleeping men in the house and I didn't want to wake them. Kerry came to visit on Friday and stayed the night and as he works so hard at his job I hate to ruin a sleep-in for him. So the cheese was grated and the minis baked while the house filled with the aroma of a French farmhouse. When Hanno woke, I had my shower, dressed then drove up the mountain with the still warm quiches.


The mini quiches. These are very popular on a fundraising stall because they seduce everyone who hasn't yet had their breakfast.

It does my heart good to see those volunteers at work. There were six of them there, organising, carrying, preening, helping and selling and all happy to do it. In the end, after four hours, they'd made just over $1000. All that money goes to the Centre to help with the work we do. We are an unfunded Centre so fundraising and donations make or break us.


Two bottles of lemon cordial, bread and butter cucumbers and some left over spiced vinegar.

Kerry left at lunchtime, I made a large jar of bread and butter cucumbers and some lemon cordial from the frozen lemon juice treasure I have hiding in the freezer, then went to my work room to sew. I few minor repairs were carried out, then I spent quite some time writing Christmas cards for the volunteers where I work. I've invited them all to afternoon tea next week where I will give each of them a small gift (I can't tell you what I bought because many of them read my blog), and my thanks for the important work they do.

The cards finished I started tidying up, putting away this and that, sorting through cottons and wool and while I worked, the rain started. We've had only one good shower of rain since the night before the wedding (in June) so I didn't get too excited. But soon the rain was horizontal, winds were roaring, leaves and small branches started falling and the front tank overflowed. Hanno and I stood on the veranda to watch the lightening fork downwards and a river of water flow down the driveway and snake its way to the side of the house. Alice and Koda stayed inside - Alice asleep with her deafness making her oblivious to the chaos outside and Koda curled up tight in the corner of my sewing room.


Alice and Koda.

Before too long, maybe an hour, the heavy rain stopped and gentle showers hung around for another hour. Our garden was well and truly soak, for the first time in many, months, and all three water tanks were overflowing. It's a good feeling going into Summer next week knowing that we have enough water to see us through it.


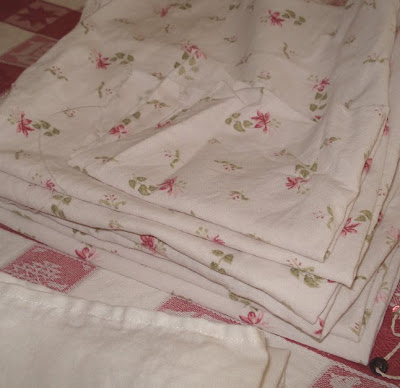
My sons know me well. Kerry gave me this vintage tea towel on the weekend. He found it in a sack of rags at the place he works at.

Sunday was a different story. I had expected to watch some of the cricket but the match finished early, on Saturday. :- ( Oh well. I baked biscuits instead. I already had the dough made up in the freezer so all I had to do was add dark choc chips, work them in, form the biscuits and put them in the fridge to harden up again before baking. Now we have a jar full of biscuits - with no preservatives - waiting to be eaten with tea and coffee. The rest of the day was taken up with writing my Burke's Backyard article and transferring hundreds of photos to a flash drive. I bought a little flash drive just for this purpose - it's 16 gigabytes and cost $50. The first of my many computers was bought in 1988, it was 20 Mb, RAM 64 kilobytes and it cost over $3000. How times have changed.

And now it's the beginning of a new week with all the possibilities and opportunities that holds. I hope your week will be a good one, you achieve all you hope to achieve and you move further along your simple life path. I wonder what new things you can tell me you did at the end of this week. : - )


SHARE:

27 November 2009

Cleaning cloths and covers

It was cricket day yesterday. The day that signifies the beginning of summer for me, when I watch the first day of a five day cricket match, doze on and off in my chair, knit, and generally laze about. Back in the 1980s, when my children were in primary school, and I was working full time and studying for a degree, it was also the time when study was finished for the year, preparations for Christmas and the summer holidays were just about to start and I had that one day off, alone, to relax.


New cleaning cloths.

I've changed in many ways since then and now I can't just sit doing nothing, so in addition to my knitting, yesterday I also made notes for a magazine article I'm writing and cut up rags. I like to keep that rag bag full and yesterday I added some good sized flannel cloths that once used to be a winter nightie. Waste not, want not. I never buy cleaning cloths, they all come from our old clothes, sheets and towels now. I cut them into the sizes I need, some I hem and some I don't, and I leave them to wait their time in my rag bag which hangs in the laundry.


The ragbag hangs in the laundry.

There are other speciality cloths here in addition to the cleaning rags. I also have a number of cotton cloths used for straining yoghurt and making cheese. These cloths are soft cotton and they generally fray around the edges, so I always hem them. I don't want fragments of cotton in our food. These cloths are also used to cover food, either sitting on the kitchen bench or in the fridge. If you don't want to use plastic wrap in the fridge, a moist cotton cloth will serve you well if the item is only in the fridge for a couple of days. If you would like to make yourself some of these cloths, buy some soft muslin, lawn or handkerchief linen, cut it to the size you need and hem the edges. Make sure you wash the cloth before using it on your food. These cloths and covers don't have to be ironed but they must always be clean.


Straining cloths and jug covers.

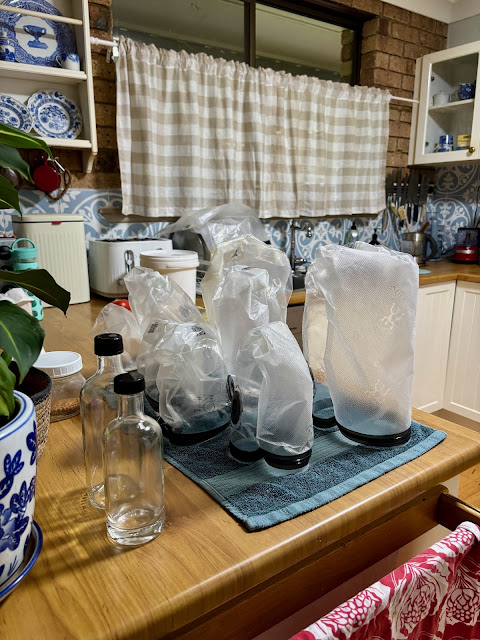
Other handy items to have in your cupboard are a few crocheted or cotton cloth jug covers. I have one large and one small crocheted cover and a couple of cotton cloth covers. The crochet covers are fine for covering a jug of milk or cold water when it's sitting on a table for a while. The cotton covers are needed when I'm fermenting and making things like ginger beer, sourdough and vinegar. They keep the bugs out, especially those annoying vinegar flies that many people call fruit flies, but they allow air and natural yeasts into the food you're making.


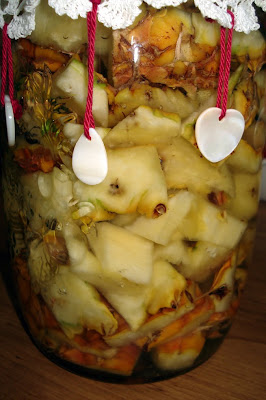
An old doiley with weights attached now serves an a jar cover.

To make a crocheted cover, there are plenty of crochet patterns online, but you could also do as I did for my small cover - I looked through my old doilies to find something suitable and just attached weights with embroidery cotton. The weights you use can be buttons, beads or shells with a hole drilled in the top.


This is a deep drawer in my kitchen where I keep my tea towels, cloths and covers.

Many of these cloths were commonplace in our grandmas' homes but they died an unnatural death in modern times. You won't find them in a shop, these are something you make yourself. But it's simple sewing, even for those who have never sewn before. They're the ideal beginners project.


Once you've made these simple covers, rags and straining cloths, you might like to ramp up your move towards self reliance and make other household linens like cloth napkins, tea towels, aprons, shopping totes and table cloths. All are easy newbie projects, all will help you create a more simple home and all will help you in your daily homemaking.

Thank you for your visits this week. We're fast moving towards the holiday season and all the extra work and busy times that holds. Don't forget to take care of yourself when you have that extra work. Take time out, take things slowly and enjoy what you do. I'll see you again next week, my friends.


SHARE:

25 November 2009

Wild fermenting - making vinegar

You would have noticed some pineapple in a jar sitting next to the beetroot yesterday. That is the first stage of pineapple vinegar I'm making from scratch. It's another great skill to have because it will mean you use the entire pineapple, not just the juicy, sweet inside. Pineapple vinegar is made from the bits you usually throw in the compost bin, but here you can put them to work for you instead of wasting a lot of the pineapple.


Start with a good pineapple - if it's organic, that's great, but you can use an ordinary pineapple from the market. Cut the top off - if you're in a warm climate, you can plant the top and grow your own pineapple - they take two years to fruit. But back to the kitchen, get your vegetable brush and thoroughly clean the pineapple skin. Rinse off and cut the skin from the pineapple. Cut the pineapple in quarters and cut out the core. You can use the pineapple flesh for any of your usual dishes, you don't need to add it to the vinegar jar.


Chop up the core and skin and put the pieces into a large jar. Mix ¼ cup of sugar in a litre/quart of water and pour it over the pineapple skin. Cover with a cotton cloth. This is a recipe where you're using the wild yeasts and bacteria in the air to help ferment the fruit and sweet water, so you don't want to put a lid on it, you want to keep bugs out and allow the yeasts in. Leave the pineapple jar sit to on the kitchen bench for a few weeks.


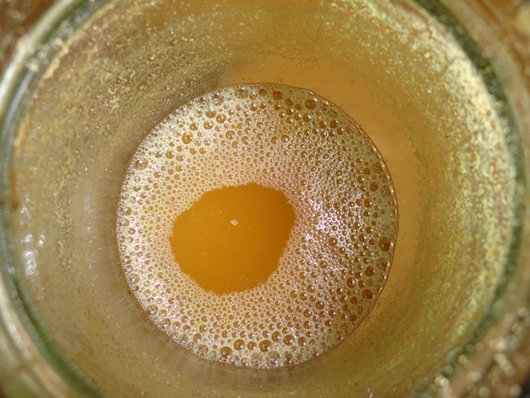
After two or three week, this mix might turn brown and then go clear again. That's good! It might also develop a little mould on top, that's fine too. Just scoop it off with a clean spoon. If a greyish gelatinous blob forms on the top of the vinegar, either as it's sitting on the bench or after it's bottled, that's excellent, you've made mother of vinegar. And you can use that mother as a starter to make more vinegar.

Two things are important in vinegar making - the temperature in the room it's made in and oxygen, another reason not to put a lid on the jar. The ideal temperature is between 15C - 25C degrees (60F - 80F). If the temperature is too low, it will take longer to make and won't be as good, and if it's too high, I doubt you'll make mother, but the vinegar will still be fine to use. You can introduce oxygen into the vinegar simply by stirring it every day.


Taste the vinegar after a couple of weeks, it should already be vinegary, you can then remove the pineapple pieces and put them in the compost. Leave the vinegar on the bench for another two weeks to develop the complex character of good vinegar. When you're happy with the taste, strain the vinegar through a clean cotton cloth two or three times and store it in a clean bottle with the lid on. It's perfectly okay to use this as it is, in fact it's a healthier alternative to the regular store bought vinegar. However, if you want to store the vinegar for a long time, you'd best pasteurise it. You do that simply by boiling it in a water bath, the guidelines for pasteurising at home are here. I keep my home made vinegar in the cupboard and use it within about two months.


Pineapple vinegar is excellent as part of a salad dressing and especially good to make a salsa dressing. You could use it to preserve your beetroot or bread and butter cucumbers. It's also a nice gift for someone who likes to cook. This is really easy to make and I encourage you to try it. I'm sure you'll be surprised at the results you get, and it's one more step on the self reliance trail.
SHARE:

24 November 2009

Making pickled beetroot

Beets are one of the most nutritious vegetables you can eat. The root can be served raw, juiced, boiled, baked and pickled. The green tops can be steamed, boiled or stir fried or used in the same way you use silverbeet or spinach. Beets are one of the easy to grow vegetables everyone should fall in love with.


If you're new to food preservation, pickled beets is one of those easy to learn processes that while not fully utilising canning or processing procedures, will help you preserve your beetroot for a very long time in the fridge.


If you're growing beets, pick about 6 of them, or buy a bunch from the market. Don't cut into the roots because they'll bleed their juice out. Cut the tops off about ½ inch above the top of the root, leaving a little of the green. Scrub the roots with a vegetable brush and wash clean. It's okay to have different sizes but you have to remember to remove the smaller ones first and give the big ones more cooking time. You want them to cook until they're knife tender.

Add the roots to a pot of cold water with a little salt added and bring to the boil with the lid on. When they start to boil, turn down the heat and simmer them until you can easily slip a sharp knife into them. Remove the small ones first, give the larger ones a couple of extra minutes cooking time. When all are cooked, drain the water off in a colander and let them cool down. This part of the process should take about 20 minutes.

When they're still warm, slip the skins off. You can do this with your hands, the skins should just slide right off. Wash your hands as soon as you finish to remove the red stains. Your hands won't be stained as long as you wash them regularly throughout this process.

While the beets are cooking you can make your spiced vinegar. Into a saucepan place:
1 cup water
2 cups vinegar - I used apple cider vinegar
2 ½ tablespoons sugar
½ teaspoon salt
2 teaspoons of mixed spices - I mixed up a combo of celery seeds, mustard seeds and peppercorns and used two teaspoons of the mix.

Bring this mixture to the boil and simmer it for two minutes.

Trim off the tops and bottoms and put into the compost bucket, then slice the roots. Six sliced beetroots will generally fit into a one litre/quart jar. Pour the spiced vinegar over the beetroot to cover all of them. Then seal the lid and store in the fridge.

NOTE: make sure your jars, lids and any seals you use are scrupulously clean. Give them a good wash and run hot water over the jar and lids before you use them. When you intend to keep food for a long time, it's important to always start off with everything clean.


Pickled beetroot will keep well in the fridge for six months. If you want to keep it longer you'll need to process it in a water bath canner.

Pickled beetroot can be served as part of a trio of pickled vegetables along with bread and butter cucumbers and pickled onions. All of them are delicious eaten as part of a salad and compliment the rich creamy dressings of some salads very nicely. I am serving this trio of pickled vegies at our Christmas lunch.

I hope you enjoy the recipe.

Nutritional Value of Beet - from here
Beet is a rich source of Potassium, Iron, Magnesium, Manganese, Phosphorus and Copper. Whereas Calcium, Sodium, Zinc and Selenium are present in small amounts. Vitamin Content: Beet consists of Vitamin C, Folate and Betaine in large quantities. Vitamin A, Thiamin, Riboflavin, Niacin, Vitamin B6 and Pantothenic Acid are also present in small amounts. It also constitutes traces of Beta Carotene.

SHARE:

23 November 2009

I can provide

Picture this. It's Sunday afternoon and I'm sitting in my workroom in an old skirt, blouse, apron and Crocs. I'm such a dag when I'm at home but if home is not the place for being daggy and comfortable in old clothes, where is? Beetroot is boiling on the stove, I have already made spiced vinegar to pour over the beets and that will be one more thing I have ready for our Christmas lunch. This year, because of the work commitments of some of our family, we're celebrating on the Sunday before Christmas, 20 December. I'm looking forward to it very much.


Food for today and tomorrow - beets, silverbeet, cucumbers, eggplant, tomatoes and capsicum/peppers.

It's hot outside - thirty six degrees when Hanno last looked, so we're all staying indoors out of harm's way. Gardening and watering was done early this morning, vegetables were harvested. I filled a basket with food to be eaten during the day and some for pickling, so it's inside tasks now, or relaxing in an armchair, knitting, which is what I'll be doing as soon as the beetroot is cooked. Hanno is on the other computer, probably reading the German newspaper or catching up on the blog or forum. A relaxed Sunday full of this and that, or nothing at all, depending on how the mood takes us.


Very soon we'll have too many eggplants.

Thank you all for your kind and loving messages about Alice. It does make a difference, you know. I'm very pleased to be able to tell you that Alice has recovered quite well. She initially had two very bad days when all she did was sleep, but yesterday she started perking up and now she's back to her old happy self. We are still keeping her quiet, as per the vet's instructions, but the truth of it is she doesn't want to be outside, she wants to be with us. We're very happy with that, we are pleased she is safe here with us because she might not have been.


New tomatoes are coming along.

We have a visitor. Koda is here for a sleepover - many weeks of sleepovers. Koda is my step-son's and DIL's Airedale. Jens and Cathy are leaving for Christmas in Europe next week and we're looking after Koda while they're away. Alice and Koda get on very well and after the initial sniffing and jumping, they settled down and now they're both asleep on the kitchen floor. The calmness of this house and the way we are here settles them.


Giant sunflowers waiting for the first sun.

I started writing this post yesterday, Sunday, and now it's Monday morning. I work at my voluntary job today and I'm looking forward to an interesting day, jam packed with things to do. First up I'll write an article for the local newspaper, then I have a meeting with my good friend Beverly, elder of the local indigenous people. She and I and a few artists will be talking about the art works we want at the new Centre. After lunch I'll answer all the emails that have arrived since I was last at work and prepare the materials for the Frugal Home workshop I'll be doing tomorrow. People will wander in and out, the phone will ring too many times and hopefully few of the calls will interrupt my work.


New space for my jars and bottles, and a spare dishrack.

All that busyness is a sharp contrast to my work at home. Here it is peaceful and quiet and although I work to a list I make up in the morning, generally it doesn't matter if the work is done today or tomorrow. I do what I feel like doing, slowly, so I know my work and it's not part of a mad rush that I won't remember. I want to remember my days here. I want to look at the new curtain I made to cover some of the jars I've moved from one cupboard to another. I want to see the curtain open and closed - it's new and it pleases me. I want to look at the newly bottled beetroot sitting beautifully in its dark pink brine, it's next to the bright yellow pineapple vinegar, fermenting under a cotton cloth. I made them both, from scratch - I didn't have to buy them at a shop, I can provide.


SHARE:

20 November 2009

Alice

I guess every pet owner dreads the day when they can see the death of their pet in the not too distant future. Hanno and I have reached that point with Alice. It's been a very sad couple of days for us. Hanno had Alice outside with him a couple of days ago looking for a bush turkey that he'd seen wandering in. He called Alice and they went outside our fenced area and down to the creek. All of a sudden, Alice took off after a scent. She didn't come back.


Alice is deaf so there was no point in calling her, so I got our whistle, which she can hear because of the high pitched sound, and I blew on that whistle for about ten minutes. No Alice. Hanno got in the car to search the neighbourhood. Just over the creek there is a big horse paddock and stables so we knew that if she ran over there, at least she wouldn't be in traffic. Not far away is Steve Irwin Way, our main road, that is always full of speeding traffic.

I waited by the gate leading down to the creek, looking to see her furry Airedale squareness come running back. She didn't come, and Hanno came back alone. A little while later, I went out and searched the streets on the other side of the creek. Still no Alice. Then the phone rang. It was the local Council asking if we had lost our dog! The woman living next door to the horse stables had heard her barking and went to investigate. She found Alice in the creek, all caught up in vines. Luckily this lady was a veterinary nurse, she untangled Alice, got her back to her home, gave her some water and phoned the Council, giving them the details on Alice's tag. She finally came home really dirty and totally exhausted. She didn't wag her tail, she dragged her back legs and she was terrified. She had been gone three long hours. We let her rest for an hour, then Hanno washed her and took her to the vet.


A new vet has bought our local practice so he gave her a really good examination. He found she had an ear infection, cataracts - which we knew about, and a severe cardiac murmur. I had noticed that in the past month or so, she'd had episodes of panting, I guess the murmur was the cause of that. There is nothing much we can do for Alice, except treat her obvious ear infection, make her comfortable and keep her happy. She doesn't want to go outside any more, she just goes out to have a drink and do a wee, then she stands at the door to come back in again. The vet said she shouldn't run around, she must rest and take it easy. Hanno and I have decided that one of us will stay with her, but if we both have to go out, we'll leave her inside on her bed in the kitchen. She's a good dog, she never jumps on furniture or destroys anything, she'll be fine inside alone.

So it's come to this. A once crazy, mad dog, full of life and joy, who used to chase Rosie around the backyard, is now a little granny resting on her bed. We've had Alice since she was a tiny puppy and have been lucky enough to share her life. It will be hard to say goodbye. Alice will be 12 years old on New Year's Eve.


SHARE:

18 November 2009

Making butter the easy way

I was asked to do a post on making butter. It's not something that is generally part of my household tasks but I do make butter when I have spare cream or at this time of year. You get the best cream and milk in Spring. Making butter over Spring will give you the finest butter.

Like most other things in this simple life, the best ingredients will give you the best end result. I use cream from Jersey or Guernsey cows for my butter making. Usually it's 45 per cent butterfat - the higher the butter fat content the easier it is to make and the better the cream and butter will be. If you can't find Jersey or Guernsey cream, buy pure whipping cream or heavy cream. Check the label and make sure there are no "stabilisers or vegetable gums" in the cream. You want pure cream.

If you can find cream at a good price and you want to make butter, it's prudent to buy a large quantity because butter made well will store for a few months in the freezer. I live in dairy country with lots of rolling hills and brown and cream coloured cows dotted throughout. Unfortunately our cream never goes on special, if it did, I'd take advantage of that and make butter when the price was low, especially if I could get a lot of Spring cream.

In the old days, homemakers used to make butter with a butter churn or by shaking a jar full of cream. Nowadays we can use our electric appliances however, butter can be made by hand simply by shaking the cream in a jar.


Generally I buy local Maleny cream but this one was cheaper, and still local, so I bought Cooloola cream this time.


You can see here just how thick and luscious it is. This is not thickened cream, it's pure Jersey cream.

HOW TO MAKE BUTTER


Place the cream into your food processor, or into a bowl if you're using an electric beater. Start processing.


This is just 20 seconds after starting. See how it's moved from soft cream to a harder cream. The higher the fat content in the cream you're using, the faster the butter will form.


You will hear the processor change as the butter starts to form and it's harder for the blades to work. In the photo above you can see the butter milk has separated from the cream. This was about 45 seconds into the process. For this small amount of cream - I used about 300 mls or just over a cup full of cream, I got about 25 mls of buttermilk. If you want to add salt, add it at this stage, after you pour off the buttermilk, according to your taste, and whizz it up again to mix it in properly.


If I were making much more butter and had a few cups of buttermilk, I would have stored it in a clean glass jar in the fridge for cooking or drinking. Hanno loves real buttermilk. I won't save this tiny portion but will add it to the water run off from washing the butter. More on this below.


After pouring off the butter milk, get some ice cold water from the fridge and pour about half a cup into the butter and continue processing. This will wash the butter. It's important to wash it properly because if you leave buttermilk in butter, it will go mouldy fairly quickly.

Make sure the water you use is ice cold. Cold water won't mix in with the butter, it will simply wash through it and wash out again. Pour the milky water off into a container.


After you wash the butter remove it from the processor onto one of the clean cotton cloths you use for yoghurt making or ginger beer. Just like yoghurt making, hang the strainer over a big jug so it can drain.

It's a good idea to have a few of these cloths made for various uses around the kitchen. I'll do a post on them soon.


Get more ice cold water and wash over the butter again, making sure the run off now is clear and not milky. Squeeze the butter in the cloth to remove the remaining liquid.


And there you have your butter!


Scrape it off the cloth on onto a serving dish or storage container and keep it in the fridge.


I poured the small amount of buttermilk into the run off milky water and will use it to soak grains and old bread for the chickens. They will LOVE it. You could also use to it soak grains you will eat or for cooking cakes or scones.

While making butter isn't something we do everyday as part of our other kitchen tasks, it is worthwhile making one batch to teach yourself this skill. It's a wonderful treat to give your guests, especially when they visit for morning tea, because so few of us have experienced real home made butter. I guarantee it will be something they will tell other people they had because it's such a rare thing nowadays. We all have a place in our heart for good butter.

And speaking of hearts and butter, this is from Nourishing Traditions, page 84:
Myth: Saturated fat clogs arteries.
Truth: The fatty acids found in artery clogs are most unsaturated (74%) of which 41% are polyunsaturated. Sourced from The Lancet 1994 [The Lancet is the world's leading independent medical journal.]

SHARE:

17 November 2009

Growing sweet potatoes

We've recently planted three sweet potato plants. We have the golden one but there are also white and purple types. Sweet potatoes are a very good crop to grow if you're in a warm climate. They won't grow in the cold. You can easily grow sweet potato from a store bought tuber. You should buy an organic tuber not only because often the others have been sprayed to prevent them from sprouting, but also because it will be a healthier living tuber. Pick a healthy looking sweet potato that is unmarked and firm. When you get it home, place it in a warm and sunny spot and wait for it to produce shoots. This could take anywhere between a couple of days to a month, depending on how warm the weather is. When you see the shoots, you'll know that the weather is warm enough to plant.


Two weeks before you plant, choose a sunny spot with good drainage and enrich the soil with compost and aged manure that is dug in, watered and allowed to sit. When you're ready to plant, cut the sweet potato into pieces depending on how many shoots are growing. If you only have one growing point, don't cut, but if you have two, cut in two, if three, divide it in three. Try to give all the growing points enough tuber from which to grow.


Our sweet potatoes - the first shoots showing on 5 November.

Make a hollow in the soil about 8 or 9 cm/3 inches deep and place your tubers in, with the shoots to the top. You'll need about 30 cm/12 inches between each cutting. Pack the soil in around the tuber, leaving the shoots exposed. Water in with seaweed tea and cover with a straw mulch. Sweet potatoes like to be watered in well, but after that they don't need a lot of water. If it rains, don't water, but water once a week if you have no rain. Repeat the seaweed tea every month to keep the plants healthy and growing well.


This morning - 12 days after the previous photo, the shoots are growing well.

The biggest problem you're likely to have with sweet potatoes is that the vines will take over the garden. We are going to grow ours over the top of the chook house to help protect it from the summer heat. If you find the vines are taking over, cut them back a bit. Don't cut them off completely, but you could easily take of a third of the growth.

Sweet potatoes are a fairly easy crop to grow and they're a good staple food to add to your diet. You can use them in any recipe to replace potatoes - to top a Shepherd's Pie , as chips or mash, or baked, golden and delicious in the oven. Classified as one of the super vegetables, they are a significant antioxidant and contain vitamin A, vitamin C, iron, copper, manganese, vitamin E, vitamin B6 and beta carotene. They are a good food for diabetics and for people with arthritis and other inflammatory disease.

When you harvest your sweet potatoes, be very careful not to bruise or cut the skin. Any damaged tubers should be the first eaten. Cure the remaining perfect tubers by drying them in a cool dry place, not the fridge. They are cured properly when you can't rub the skin off with your finger. Long term storage should be in the coolest room in your house, pack the tubers in baskets lined with newspaper and cover the basket with a towel. This allows the tubers to breath without sweating. Home grown sweet potatoes won't rot as quickly as the store bought ones.

If you live in a warm climate and are just coming into the end of spring, you can plant your sweet potatoes now. They should be ready to harvest in about 16 weeks time - early March.

Cauliflower and Sweet Potato Curry

Thanksgiving Sweet Potato recipes
SHARE:

16 November 2009

Organic cotton tea cosy

It getting towards that time of year when things start getting very busy. I spent some time on the weekend working on my Christmas gifts but I'm not sure my ambitious plans will result in me finishing everything on time. Despite the extra work, I love this time of year, especially now that my boys are happily settled with their girls and our expanding family gives us more reasons to celebrate.

We had a visit from Shane and Sarndra yesterday, Kerry and Sunny will drop in today. Sarndra is a real family girl. She is happily connected to her own family and is making a real effort to get to know all of us now. She looked gorgeous yesterday in her blue summery dress - she usually wears dresses or skirts (just like me). She is an absolute joy to me. Sunny is a shy girl with us and not confident with her English but she really is a good fit with our family. She is a beautiful girl, an excellent cook and is very close to her mother. That's a good sign! I am truly blessed to have these two girls in my life now.

Sarndra is teaching herself to sew and knit. It's quite the thing now apparently. No longer seen as the domain of us oldies, sewing and knitting are cool again. Thankfully these things go in cycles and each time they come around new techniques, as well as the traditional methods, are discovered by new eyes. And what a wonderful world it opens up - being able to make beautiful and unique items for yourself, your home and to give to friends. You can always pick the home of a crafter - you'll find things there that you won't find anywhere else. These homes stand out as warm and inviting because they are decorated with the simple finery of a creative mind.

This is what I was working on this weekend. It's a tea cosy knitted with organic cotton, topped with pure wool felt flowers. It's a very simple project that I started knitting last weekend and almost finished yesterday. Actually I thought I had finished but when I put the cosy on the teapot, I realised it need more flowers. So that will be completed later in the week, but you'll get the idea from these photos.


I didn't have a pattern, I just cast on enough stitches to cover half my tea pot. It was 40 stitches for each half. I just measure it as I knitted and half way up, I started knitting two together to reduce the size of the top. Then I cast off and sewed the two sides together with a wool needle and more of the organic cotton, making sure I left the appropriate holes for the spout and handle.


Next came the felt flowers. I cut strips of felt, then cut them into squares, and the squares into circles with wavy edges. Then it was simply a matter of curling the felt up so it resembled a flower.


Each flower was sewn onto the cosy with embroidery floss in a colour matching the felt.


In no time I had what I thought were enough flowers, but when I tried it on the tea pot, I realised I still need probably another three flowers over the top of the spout.


I wonder how many of you are working on handmade projects at the moment. If you're new to all this, I would love you to tell me what you're working on and how you feel about your work. And for those who haven't yet taken up the needles, and for those who have, here are a few sewing projects that are suitable for a beginner or as a second or third project. If you have some photos of your projects you'd like to share with me, please post them at the forum. I'd be delighted to see what you're working on.

It gives me great pleasure to be able to encourage you in your needlework. In days gone by, women always did this. They encouraged each other, taught the younger girls and they socialised with their crafts in sewing circles and quilting bees. We might not be close enough to walk to each others homes, but we are creating a world-wide sewing circle here, and we can see each other's projects and talk about them. You will be enriched by the time you spend on hand made items and it's more than likely that you'll delight the person you give a handmade gift to. All it needs is for you to start.

SIMPLE PROJECT TUTORIALS
Machine sewing
Crochet roll
Patchwork sewing machine cover
iPod or camera case

Hand sewing
Queen Anne's Lace pillow slip
Snowflake pendant or Xmas decoration
Felt tea cosy
Apple hoop picture

Buying a sewing machine
SHARE:

13 November 2009

Introducing ...

I see things differently now. Gone are the days when I wanted to live to be 110 and I thought illness was a weakness – not in others but in myself. All my life I’ve been lucky enough to be healthy, optimistic and forward thinking and now, while still retaining those characteristics, I see times when age has caught up with me and bending over the wrong way or carrying something too heavy for me will make me suffer.

I see the strong and capable man I married, who has always prided himself on providing well for his family and done more than enough for us, hobbling around with painful joints and being frustrated at his own inability to work as he would like. Oh, he still climbs trees, much to his doctor’s annoyance, still thinks he can take on the world but age has a way of letting us remember past glories and not current reality. He pays the price if he works hard all day, so do I, and often I don’t even try to do it any more.

But on the flip side, I love being my age. From the time when I was about 15 until about 55, I felt young, strong and invincible. Now I feel mellow and wise, and strong, but in a different way. Is it okay to call yourself wise? I’m not sure. I feel I know things now that I knew before, but now I see them differently. If that's not the accumulated wisdom of the decades I’ve lived, it’s close to it. People look at us oldies differently and if they don't, we're invisible. I refuse to be invisible and make myself heard as much as possible. Often older people are seen as weak or not knowing much. That shallow view belies what being an elder is. What some see as weakness is really acceptance. I understand a lot more now about what makes us tick and when I see others make the same mistakes I made when I was younger, I just shrug and accept it as being human. I still know all I knew when I was younger, and more, but it's not as important to me now to let everyone know it.

In addition to seeing my own and Hanno’s decline, I am also witnessing the illness of my close friend Bernadette. She's a fiery old bird and as tough as they come, but she’s been laid low with cancer and all the treatments and psychological drama that go with it. Hanno and I are walking this road with Bernadette, wherever it takes us, and whether it’s a good day or a bad one, we usually find something to have a laugh about. And out of the ashes of all that Bernadette has been through these past few months, comes hope and and belief in the future. She bought herself a puppy! Just before she was diagnosed, Bernadette’s old dog Iona died. So after a lot of thought, and a promise from Hanno and I to look after her puppy if anything happens to her, she picked up her cute little Shih Tzu a few days ago. That, my friends, is the wisdom that age brings.


Is there anything more optimistic and hopeful than a puppy? Introducing Flora McDonald.
SHARE:

11 November 2009

Big changes at the kitchen sink


I've come full circle. I started off my dish cleaning duties as a young girl when my sister and I had to dry when mum washed up. I grew up doing that and now I recall it fondly as a time of family conversations, pushing my sister (she reads my blog and she'll probably add more to that) and sometimes, only sometimes, pretending to be sick to get out of wiping up. It's a nice memory to have. So now I'm back at the sink, this time as the washer, with no dryers and no electric dishwasher. That is sitting outside the back door waiting to be sold. It feels good to have made the decision to get rid of it - yet another thing we've simplified.


Position vacant: where the dishwasher once stood. This space is waiting patiently for Hanno to be well enough to make some shelves. I will make a little curtain to cover it and it will hold some of my recycled jars and bottles.

When my mother did the washing up, although I remember a bar of yellow laundry soap being there over the years, she used detergent probably from the mid-1950s. So from then until now, I've usually used detergent. In the past couple of years, I've had periods when I used my homemade soap, but there was always a bottle of detergent around. We still have a couple of bottles of detergent in the cupboard and I will use them, but when they're gone, that's it - we are a detergent-free zone.

You need to use more liquid soap than you would with a concentrated detergent. I'm using about two tablespoons of soap in my washing up sink. I'm also equipped with two washing racks, a draining board on which one of them sits (generally we only have enough for one drainer), a handmade dishcloth, a cotton washing up mop and some steel wool. I usually use one of those steel wire scrubbers that lasts me at least three months, with disinfecting every so often. But Hanno bought steel wool recently, so I'm using that. I don't like it, although it does a good job.


Liquid soap just added.

The warm water starts off with a lather when the soap is added but the bubbles don't last as long as detergent bubbles do. We've been scammed into thinking - both with washing dishes and clothes - that we need bubbles. It's not so, bubbles do nothing. I'm very happy with the dishes washed with this liquid soap. They are as clean as when washed with detergent, the time I spend washing up is the same but I'm much happier because I'm not using petro-chemicals. I always had a niggling doubt that there was a residue on the plates and cups, even though I rinse them well.


At the end of the washing - dirty water and few bubbles.

This soap may also be used as a handwash - you can dilute it 20 percent soap to 80 percent water and store it in a dispenser. I've washed pure wool with it and was very happy with the result. I've washed my hair with it and it was shiny and soft and, just like with homemade hard soap, didn't need hair conditioner. You can use it as a shaving soap - it's mild and contains glycerin so it leaves the skin smooth. Rubbing a few drops of this soap into a stain and putting it in with the normal wash usually removes the stain. It makes an excellent natural horticultural soap that will help control aphids, mealybugs, whitefly, scale and red spider mites. It doesn't kill them as a poison would, it suffocates them.


I foresee a time when I will be washing up with my daughters-in-law drying for me, all of us talking about our lives while the menfolk are outside picking vegetables to be taken home. Maybe over the years, smaller drying hands will be added to this productive group. :- ) It's a fond and comfortable vision I have made just out of this one adjustment to our lives, but standing at the sink with my hands in warm water makes for those tender scenes in my head. It seems like such a good idea to me.

ADDITIONAL READING:
I have no problem using borax but I know there are some who doubt whether it is a good idea. When I was growing up it was quite common to use borax eye wash, and it is still a recommended homoeopathic treatment. Here is some extra information about it.
Borax information
Green Living
How borax works

SHARE:
Blogger Template by pipdig